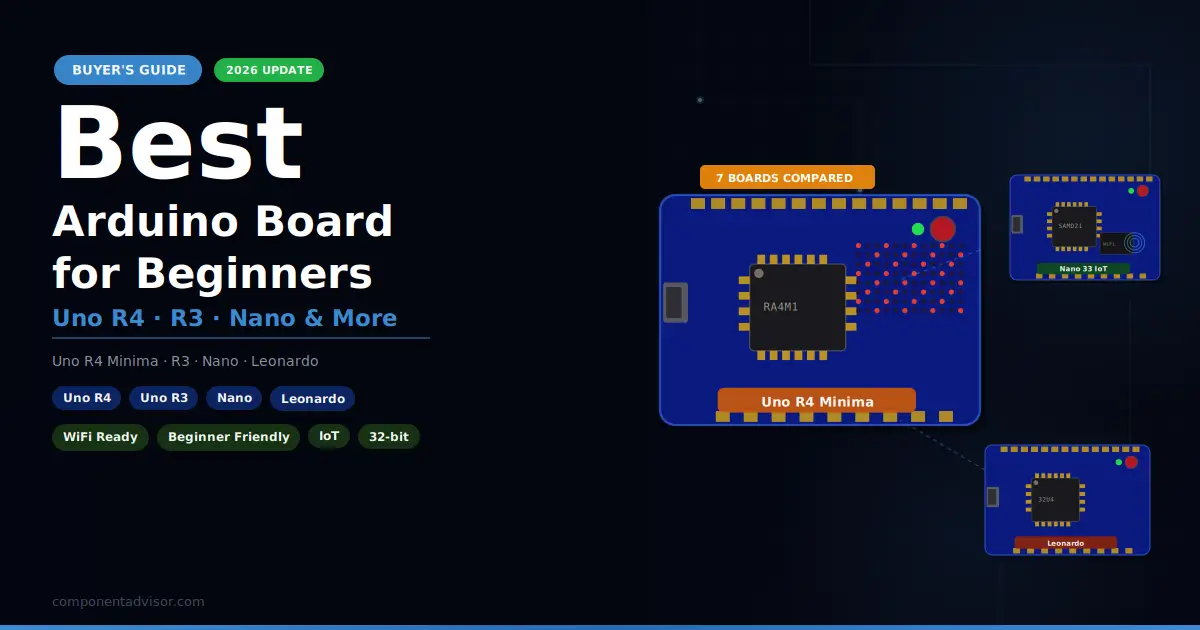
Choosing the best Arduino board for beginners is harder than it should be. There are more than a dozen official Arduino models on the market, each aimed at a different use case, and most comparison articles online are years out of date, still recommending boards that Arduino itself has quietly moved away from. This guide is current: it covers the Uno R4, the board that has actually replaced the R3 as Arduino’s flagship beginner model, alongside the smaller and IoT-focused boards worth knowing about.
This guide is written for absolute beginners: people who have never used a microcontroller before and just want a clear, honest answer about which board to buy first. We will cover seven boards, explain what actually makes a board beginner-friendly, and walk through the real differences between the R3 and R4 generations so you are not buying based on outdated information.
New to Arduino entirely? ArduinoYard’s Getting Started with Arduino guide walks through installing the software, connecting your board, and uploading your first program. If you want to try before you buy, the Wokwi Arduino simulator guide lets you write and test code in a browser with no hardware required.
Quick Answer
If you are just starting out, the Arduino Uno R4 Minima is the best Arduino board for beginners right now. It is Arduino’s current-generation flagship, it is compatible with the same huge library of tutorials written for the older R3, and it adds a faster processor and more memory without adding any real complexity to the beginner experience.
If you specifically want the older, extremely well-documented board that most existing tutorials online were originally written for, the Arduino Uno R3 is still an entirely reasonable and often cheaper choice.
Quick Comparison Table
| Board | Processor | Best For | Difficulty |
|---|---|---|---|
| Arduino Uno R4 Minima | 32-bit Renesas RA4M1 | Best overall for beginners | Very Easy |
| Arduino Uno R3 | 8-bit ATmega328P | Best budget/legacy pick | Very Easy |
| Arduino Nano | 8-bit ATmega328P | Best compact breadboard board | Easy |
| Arduino Nano Every | 8-bit ATmega4809 | Best small modern alternative | Easy |
| Arduino Uno R4 WiFi | 32-bit RA4M1 + ESP32-S3 | Best full-size beginner IoT board | Medium |
| Arduino Nano 33 IoT | 32-bit SAMD21 + NINA-W102 | Best compact IoT board | Medium |
| Arduino Leonardo | 8-bit ATmega32U4 | Best for USB keyboard/mouse projects | Medium |
1. Best Overall: Arduino Uno R4 Minima
Arduino Uno R4 Minima
Best for: Absolute beginners who want the current-generation board with the smoothest learning experience.

The Uno R4 Minima is Arduino’s official replacement for the long-running Uno R3, and it is now the board Arduino themselves point beginners toward. It keeps the same physical footprint, the same shield compatibility, and the same beginner-friendly USB setup as the R3, while swapping the old 8-bit ATmega328P for a 32-bit Renesas RA4M1 processor running at 48MHz, roughly three times the clock speed of the R3. In practice this means sketches compile and run faster, and you have far more headroom for larger projects before running into memory limits.
Because the R4 Minima uses the same pin layout and mostly the same core Arduino programming functions as the R3, the overwhelming majority of tutorials, libraries, and example projects written for the R3 work on the R4 without modification. You are not sacrificing the tutorial ecosystem by choosing the newer board, you are simply getting more capable hardware underneath it. The R4 Minima also adds a built-in real-time clock and a small onboard LED matrix, both of which open up simple beginner projects (like a digital clock or a scrolling text display) that used to require extra components on the R3.
Specifications:
- Processor: Renesas RA4M1 (32-bit ARM Cortex-M4), 48MHz
- Flash memory: 256KB
- SRAM: 32KB
- Digital I/O pins: 14
- Analog input pins: 6
- Onboard extras: Real-time clock, 12×8 LED matrix
- Connectivity: USB-C
Why it stands out:
- Current Arduino flagship board, officially supported and actively developed
- Same physical footprint and shield compatibility as the R3, so most beginner kits still fit
- 32-bit processor gives significantly more headroom for larger sketches than the R3
- Built-in RTC and LED matrix enable projects that would otherwise need extra modules
- USB-C connector is more modern and reversible compared to the R3’s USB-B port
Things to keep in mind:
- Costs somewhat more than the older R3
- A handful of very old, poorly maintained libraries written specifically for AVR chips may need updated versions to work
- Overkill in raw processing power for the simplest blink-an-LED beginner projects, though this causes no practical downside
👉 Buy Arduino Uno R4 Minima on Amazon
Verdict: The right board to buy first in 2026. It has fully replaced the R3 as Arduino’s recommended beginner board, and it does so without adding any complexity to the beginner experience.
2. Best Budget/Legacy Pick: Arduino Uno R3
Arduino Uno R3
Best for: Beginners who want the most widely documented Arduino board ever made, often at a lower price than the R4.

The Arduino Uno R3 remains the most popular Arduino board in history, and the sheer volume of tutorials, books, YouTube videos, and forum posts written specifically for it is difficult to overstate. If you follow any beginner Arduino tutorial published in the last decade, there is a strong chance it was written and tested on an Uno R3. That documentation depth alone is a genuine reason to still consider it, even with the newer R4 available.
The R3 uses the 8-bit ATmega328P processor running at 16MHz, considerably slower than the R4’s 32-bit chip, but entirely sufficient for the vast majority of beginner projects: blinking LEDs, reading sensors, driving small motors, and controlling simple displays. Its large physical size and widely spaced pin headers also make it genuinely easier to wire correctly on a breadboard compared to smaller boards, which matters more than raw processing power when you are just learning to read circuit diagrams.
Specifications:
- Processor: ATmega328P (8-bit AVR), 16MHz
- Flash memory: 32KB
- SRAM: 2KB
- Digital I/O pins: 14
- Analog input pins: 6
- Connectivity: USB-B
Why it stands out:
- The single most documented microcontroller board in the hobbyist world
- Large board size and widely spaced headers make wiring mistakes less likely for first-timers
- Frequently available at a lower price than the R4, including from third-party manufacturers
- Compatible with essentially every Arduino shield and beginner kit ever produced
- 16 years of accumulated community knowledge means almost any problem you hit has already been solved online
Things to keep in mind:
- Noticeably slower and more memory-constrained than the R4 for larger or more complex sketches
- USB-B connector is bulkier and non-reversible compared to the R4’s USB-C
- No built-in RTC or LED matrix, so equivalent projects need extra components
👉 Buy Arduino Uno R3 on Amazon
Verdict: Still a completely reasonable first board, particularly if budget matters or if you are specifically following an older tutorial written for the R3. Just know that the R4 Minima above is the more future-proof choice for the same learning experience.
3. Best Compact Board: Arduino Nano
Arduino Nano
Best for: Beginners moving toward breadboard-based builds who want a smaller, cheaper board once they understand the basics.

The Arduino Nano runs the same ATmega328P processor as the Uno R3, so it shares the exact same programming environment, libraries, and general capability, just packed into a breadboard-friendly form factor roughly a quarter of the Uno’s size. It plugs directly into a standard breadboard, which is genuinely convenient once you are ready to build more compact projects and no longer want a full-size board taking up space.
This is generally not the best first board because its narrower pin spacing is easier to wire incorrectly for someone who has never used a breadboard before, but it becomes an excellent second board once the fundamentals click. It is also cheaper than the Uno in most cases, which matters if you are planning to build several small projects and want to buy multiple boards.
Specifications:
- Processor: ATmega328P (8-bit AVR), 16MHz
- Flash memory: 32KB
- SRAM: 2KB
- Digital I/O pins: 14
- Analog input pins: 8
- Connectivity: Micro USB or USB-C depending on revision
Why it stands out:
- Same core capability as the Uno R3 in a much smaller footprint
- Plugs directly into a breadboard without jumper wires for power and ground
- Cheaper than a full-size Uno in most cases
- Ideal for permanent small projects where board size matters
- Fully compatible with Uno R3 code and libraries
Things to keep in mind:
- Tighter pin spacing is more prone to wiring mistakes for absolute first-timers
- Smaller silkscreen labels are harder to read than on the Uno
- Best treated as a second board rather than a first purchase
Verdict: A great second board once you have learned wiring basics on something larger. Not the worst first choice either, but the Uno family will be a gentler introduction.
4. Best Modern Small Alternative: Arduino Nano Every
Arduino Nano Every
Best for: Beginners who want the compact Nano form factor with newer, more capable hardware underneath.

The Nano Every updates the classic Nano with a newer ATmega4809 processor that runs faster and includes more usable I/O options, while keeping the exact same physical size and pin layout as the original Nano. For beginners specifically, the practical difference is modest: most simple projects will not notice the extra processing headroom, but it is a genuinely better piece of hardware for the same compact footprint and similar price.
Programming the Nano Every works identically to any other Arduino board through the standard Arduino IDE, and it remains compatible with the overwhelming majority of Nano-targeted tutorials and libraries. It is a sensible default if you specifically want the small Nano form factor and would rather buy the newer revision than the original.
Specifications:
- Processor: ATmega4809 (8-bit AVR), 20MHz
- Flash memory: 48KB
- SRAM: 6KB
- Digital I/O pins: 14
- Analog input pins: 8
- Connectivity: Micro USB
Why it stands out:
- Faster clock speed and more memory than the classic Nano in the same physical size
- Fully compatible with the standard Arduino IDE and most Nano tutorials
- Same compact breadboard-friendly footprint as the original Nano
- More headroom for growing project complexity without needing a larger board
Things to keep in mind:
- Still shares the Nano’s tighter pin spacing, which is less forgiving for absolute beginners
- Marginal real-world benefit over the classic Nano for very simple projects
- Availability and pricing can vary more than the extremely common classic Nano
👉 Buy Arduino Nano Every on Amazon
Verdict: A sensible upgrade pick if you specifically want a small board and are choosing between Nano variants. Not dramatically better for beginner purposes, but there is no real reason to prefer the older classic Nano over this one at similar pricing.
5. Best Full-Size IoT Board: Arduino Uno R4 WiFi
Arduino Uno R4 WiFi
Best for: Beginners who want to move into WiFi-connected and IoT projects while staying on the familiar full-size Uno form factor.

The Uno R4 WiFi takes everything from the R4 Minima and adds an onboard ESP32-S3 module dedicated purely to WiFi and Bluetooth connectivity, alongside the same 12×8 LED matrix and real-time clock. This is the board to reach for once basic blinking-LED and sensor projects start feeling too simple and you want to build something that talks to the internet: a weather station that logs data to the cloud, a smart home control panel, or a project you can check on from your phone.
Because the WiFi functionality runs on a genuinely separate coprocessor rather than sharing resources with the main RA4M1 chip, the R4 WiFi does not suffer the performance trade-offs that some combined WiFi microcontrollers experience. For a beginner specifically interested in connected projects, this is a meaningfully easier starting point than jumping straight to a bare ESP32 board, since Arduino’s own documentation and examples are written with beginners in mind rather than assuming embedded systems experience.
Specifications:
- Processor: Renesas RA4M1 (32-bit ARM Cortex-M4), 48MHz
- WiFi/Bluetooth: Onboard ESP32-S3 module (dedicated coprocessor)
- Flash memory: 256KB
- SRAM: 32KB
- Digital I/O pins: 14
- Onboard extras: Real-time clock, 12×8 LED matrix
- Connectivity: USB-C, WiFi, Bluetooth
Why it stands out:
- Dedicated ESP32-S3 coprocessor handles WiFi and Bluetooth without taxing the main processor
- Same full-size, breadboard-friendly footprint as the R4 Minima and R3
- Arduino’s official documentation for this board is written specifically for beginners
- Same LED matrix and RTC features as the Minima, plus genuine wireless capability
- Easier on-ramp into IoT projects than starting with a bare ESP32 development board
Things to keep in mind:
- Setting up WiFi credentials and networking concepts adds a genuine layer of complexity over the non-WiFi boards
- Costs more than the Minima or R3
- Not the right first board if you have never soldered an LED before; get comfortable with basics first
👉 Buy Arduino Uno R4 WiFi on Amazon
Verdict: The best second or third board once you are ready to move into connected projects. Its full-size footprint makes it a gentler step up than jumping straight to bare ESP32 hardware.
6. Best Compact IoT Board: Arduino Nano 33 IoT
Arduino Nano 33 IoT
Best for: Beginners who want WiFi and Bluetooth connectivity in the smaller Nano form factor rather than the full-size Uno.

The Nano 33 IoT covers similar ground to the Uno R4 WiFi, built-in WiFi and Bluetooth for connected projects, but in the much smaller Nano footprint. It uses a 32-bit SAMD21 processor paired with a NINA-W102 module for wireless connectivity, along with a built-in six-axis IMU (accelerometer and gyroscope) that the R4 WiFi does not include. That IMU opens up motion-sensing projects, like simple gesture detection or orientation tracking, without needing a separate sensor module.
Choosing between this and the Uno R4 WiFi mostly comes down to physical size and whether you want the onboard motion sensor. If your project needs to fit in a small enclosure or you specifically want built-in motion sensing, the Nano 33 IoT is the better fit. If you want the larger, easier-to-wire footprint and the LED matrix, the R4 WiFi makes more sense.
Specifications:
- Processor: SAMD21 (32-bit ARM Cortex-M0+), 48MHz
- WiFi/Bluetooth: NINA-W102 module
- Onboard sensor: LSM6DS3 six-axis IMU (accelerometer + gyroscope)
- Digital I/O pins: 14
- Analog input pins: 8
- Connectivity: Micro USB, WiFi, Bluetooth
Why it stands out:
- Compact Nano-sized footprint with genuine WiFi and Bluetooth capability
- Built-in six-axis IMU enables motion and orientation projects without extra sensors
- Lower power draw than the full-size Uno R4 WiFi, useful for battery-powered builds
- Good stepping stone toward more advanced 32-bit ARM programming concepts
Things to keep in mind:
- Smaller pin spacing shares the same wiring challenges as the standard Nano
- No onboard LED matrix or RTC, unlike the Uno R4 WiFi
- Networking setup still requires the same basic WiFi credential configuration as any connected board
👉 Buy Arduino Nano 33 IoT on Amazon
Verdict: The right pick if you want WiFi projects in a small footprint or specifically want the onboard motion sensor. Otherwise, the Uno R4 WiFi is the easier board to wire and debug for a beginner.
7. Best for USB Projects: Arduino Leonardo
Arduino Leonardo
Best for: Beginners specifically interested in projects where the board needs to act as a USB keyboard, mouse, or other input device.

The Arduino Leonardo uses an ATmega32U4 processor with built-in USB communication, which lets it emulate a keyboard, mouse, or other USB human interface device directly, something none of the boards above this in the list can do without an add-on module. This unlocks a specific category of beginner-friendly projects: custom mechanical keyboards, macro pads, physical game controllers, or simple automation tools that need to send keystrokes to a computer.
This is not a board most complete beginners should buy first, since its specific strength (USB HID emulation) is not something you need until you have a project in mind that requires it. But for anyone who already knows they want to build a custom keyboard or controller, the Leonardo removes the need for extra USB interface hardware that other boards would require for the same project.
Specifications:
- Processor: ATmega32U4 (8-bit AVR), 16MHz
- Flash memory: 32KB
- SRAM: 2.5KB
- Digital I/O pins: 20
- Analog input pins: 12
- USB: Native USB HID support (keyboard/mouse emulation)
Why it stands out:
- Native USB HID emulation lets the board act as a keyboard or mouse without extra hardware
- More digital and analog pins than the standard Uno
- Well suited to custom keyboard, macro pad, and controller projects
- Same core Arduino IDE programming experience as other AVR-based boards
Things to keep in mind:
- Not the right first board unless you specifically need USB HID functionality
- USB HID projects involve slightly more advanced code concepts than basic sensor projects
- Fewer beginner tutorials are written around this board compared to the Uno family
👉 Buy Arduino Leonardo on Amazon
Verdict: Not a board for everyone, and not a first purchase for most beginners. But if you already know you want to build something that acts as a USB keyboard or controller, this is the board that makes that project straightforward.
Which Arduino Board Should You Buy?
For nearly every complete beginner, the Arduino Uno R4 Minima is the best Arduino board for beginners to start with in 2026. It gives you the full benefit of Arduino’s enormous tutorial ecosystem, since it shares the R3’s form factor and most of its programming interface, while running on genuinely current hardware that will not feel limiting as your projects grow. If budget is the deciding factor, or you are specifically following an older tutorial written before the R4 existed, the Arduino Uno R3 remains a completely reasonable choice.
Once you are comfortable with the basics, the Arduino Nano or Nano Every make sense as a smaller, cheaper second board for breadboard-based projects. If your interest shifts toward WiFi and connected projects, choose between the Uno R4 WiFi for a full-size, easier-to-wire board with a built-in LED matrix, or the Nano 33 IoT for a smaller footprint with a built-in motion sensor. The Arduino Leonardo is a specialist pick: skip it unless you already know you want to build a custom USB keyboard or controller.
What Is an Arduino Board? (Beginner Explanation)
An Arduino board is a small programmable circuit board that lets you control real-world electronics, LEDs, sensors, motors, displays, and buttons, using simple code written on your computer. You connect the board to your computer with a USB cable, write a program (called a “sketch” in Arduino terminology), and upload it to the board’s memory. Once uploaded, the board runs that program independently, reading sensor inputs and controlling outputs without needing the computer connected at all.
Arduino boards became the default starting point for electronics hobbyists because the platform was specifically designed around accessibility: the programming language is a simplified version of C++, the official IDE has clear error messages aimed at non-experts, and the massive community means almost any beginner problem already has a documented solution somewhere online.
R3 vs R4: What Actually Changed
The jump from the Uno R3 to the R4 is more significant than a simple version bump. The R3 uses an 8-bit ATmega328P processor running at 16MHz with 32KB of program memory. The R4 switches to a 32-bit Renesas RA4M1 processor running at 48MHz with 256KB of program memory, roughly three times the clock speed and eight times the available memory. For a beginner writing simple sketches, this rarely matters day to day. Where it matters is as your projects grow: more sensors, more complex logic, larger libraries, and math-heavy calculations all run more comfortably on the R4’s newer hardware. The R4 also adds a built-in real-time clock and LED matrix that the R3 never had, both genuinely useful for common beginner project types like clocks and simple animated displays.
What Beginners Should Avoid at First
Some boards are excellent tools but poor starting points. The Arduino Due and other high-performance ARM boards assume familiarity with concepts beginners have not encountered yet. A bare ESP32 development board (not an Arduino-branded R4 WiFi) is powerful and cheap but has a steeper initial learning curve around board manager setup and networking that can be genuinely discouraging for someone on their very first project. These are all excellent boards to grow into, just not ideal first purchases.
What Else Beginners Need
Beyond the board itself, most beginners also need a breadboard, jumper wires, a handful of LEDs and resistors, and basic sensors to start experimenting. Buying these separately works, but a bundled starter kit is usually cheaper and saves the guesswork of figuring out exactly which components you need. Our guide to the best Arduino starter kits covers the strongest bundled options if you want everything in one box.
Final Recommendation
Buy the Arduino Uno R4 Minima if you are starting from zero in 2026. It gives you current hardware, full compatibility with the existing Arduino tutorial ecosystem, and room to grow without hitting memory or speed limitations early on. If budget is tight, the Arduino Uno R3 remains a solid, well-documented alternative.
Once your first board arrives, ArduinoYard’s Getting Started with Arduino guide walks through installing the IDE and uploading your first sketch, and the Wokwi simulator guide is worth bookmarking if you want to test code ideas before wiring anything up. When you are ready for your first real project, ArduinoYard’s autonomous edge-detection robot build is a genuinely satisfying first build that goes beyond blinking an LED.
Ready to move past the breadboard stage? Our guides on the Best Arduino Starter Kits, Best Soldering Kits for Beginners, and Best Arduino Sensor Kits cover what to buy next as your projects grow.