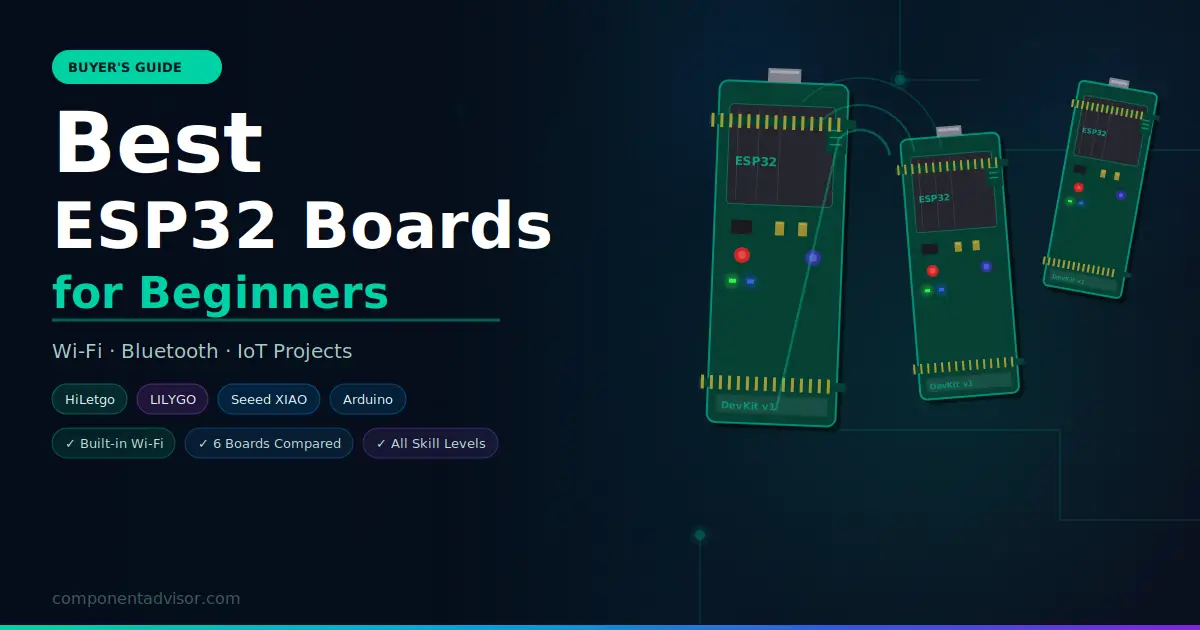
If you’ve been working with Arduino for a while, you’ve probably heard about ESP32. And if you’re just starting out in microcontrollers, it’s one of the best platforms to learn on in 2026.
The ESP32 is a powerful microcontroller with built-in Wi-Fi and Bluetooth, more processing power than a standard Arduino, and a massive community behind it. You can build smart home devices, wireless sensors, web servers, Bluetooth controllers, and camera systems, all with a single board that costs less than $10.
The catch is that “ESP32” is not one specific board. It’s a chip family made by Espressif Systems, and dozens of manufacturers build development boards around it. Some are excellent. Others have poor documentation, breadboard issues, or USB compatibility problems that will frustrate you from day one.
This guide cuts through the noise and covers the best ESP32 development boards available right now, matched to different use cases and experience levels.
New to ESP32 and coming from Arduino? Before picking a board, it’s worth having the right tools on your bench. See our guide to the best multimeters for electronics beginners to make sure you’re set up for debugging.
ESP32 vs Arduino — The Short Version
If you’re coming from Arduino, here’s what changes with ESP32:
More power. The ESP32 runs a dual-core 240MHz processor compared to the Arduino Uno’s single-core 16MHz. It has significantly more RAM and flash storage.
Built-in Wi-Fi and Bluetooth. No shields, no extra modules. Wi-Fi and Bluetooth are baked into the chip. This alone makes ESP32 the default choice for any IoT or wireless project.
3.3V logic. Unlike the Arduino Uno’s 5V logic, ESP32 pins operate at 3.3V. This matters when connecting sensors and modules — you may need a logic level converter for 5V devices.
More pins. Most ESP32 boards offer more GPIO pins than an Arduino Uno, including multiple SPI, I2C, UART, and ADC interfaces.
Same IDE. You program ESP32 using the Arduino IDE with the ESP32 board package installed. The syntax is nearly identical to Arduino code.
What to Look for in an ESP32 Board
Module type. Most beginner boards use either the ESP32-WROOM-32 or ESP32-WROOM-32D module. Both are reliable and well-documented. Avoid obscure module variants unless you have a specific reason.
Pin count. 30-pin and 38-pin are the two most common layouts. The 38-pin boards give you more GPIO options and are worth the small extra cost.
USB connector. Newer boards use USB-C, which is more convenient than the older Micro-USB. Not a dealbreaker, but worth considering.
Breadboard compatibility. Some 38-pin boards are too wide to fit on a standard breadboard with usable rows on both sides. Check this before buying if breadboarding is important to your workflow.
CP2102 vs CH340 USB chip. Both work fine, but CP2102 tends to have fewer driver issues on Windows machines.
Quick Comparison Table
| Board | Module | Pins | USB | Best compact/low power |
|---|---|---|---|---|
| HiLetgo ESP32 DevKit | WROOM-32 | 30 | Micro | Best overall beginner board |
| AITRIP ESP32 38-pin | WROOM-32 | 38 | USB-C | Best upgraded beginner pick |
| Seeed XIAO ESP32C3 | ESP32-C3 | 11 | USB-C | Best compact / low power |
| LILYGO T-Display | WROOM-32 | 38 | Micro | Best with built-in display |
| Arduino Nano ESP32 | ESP32-S3 | 30 | USB-C | Best for Arduino users |
| NodeMCU-32S | WROOM-32 | 38 | Micro | Best budget multi-pack |
1. Best ESP32 Board for Beginners Overall
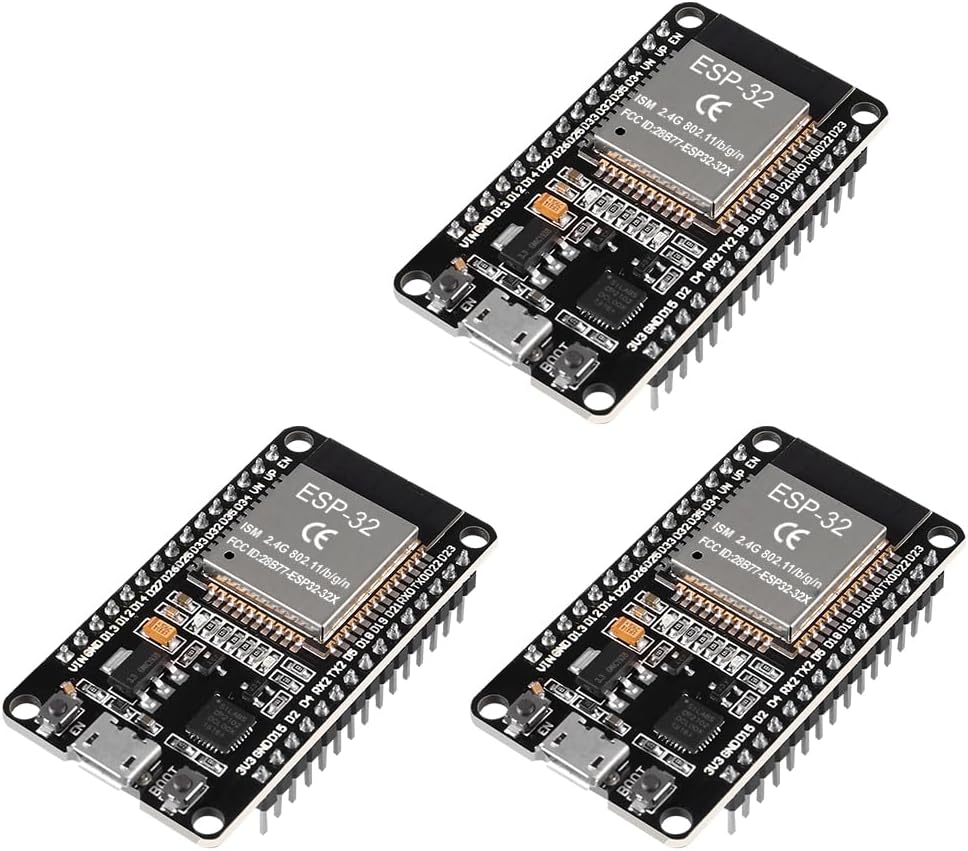
HiLetgo ESP32 DevKit V1 (WROOM-32)
Best for: First ESP32 board, learning the platform, following online tutorials

The HiLetgo ESP32 DevKit V1 is the most popular ESP32 development board on Amazon, and the one most beginner tutorials are written for. It’s based on the standard ESP32-WROOM-32 module in a 30-pin layout, with an onboard USB-to-serial chip, reset and boot buttons, and a power LED.
If you search for “ESP32 tutorial” on YouTube or Google, the board in the thumbnail is almost always this one or something nearly identical. That compatibility with existing learning resources is a big deal when you’re starting out.
Specifications:
- Module: ESP32-WROOM-32
- CPU: Dual-core 240MHz
- RAM: 520KB SRAM
- Flash: 4MB
- GPIO: 30 pins
- USB: Micro-USB with CP2102
- Wi-Fi: 802.11 b/g/n
- Bluetooth: 4.2 Classic + BLE
Why it works for beginners:
- Standard layout that matches the majority of online tutorials and pinout diagrams
- CP2102 USB chip means fewer driver issues on Windows
- Compact 30-pin size fits neatly on a breadboard
- Stable power regulation for sensor projects
Things to keep in mind:
- Micro-USB rather than USB-C
- 30 pins means fewer GPIO than wider boards
👉 Buy HiLetgo ESP32 DevKit on Amazon
Verdict: The safest first ESP32 board you can buy. Maximum tutorial compatibility, reliable hardware, and a price that makes it easy to buy a spare.
2. Best Upgraded Beginner ESP32 Board
AITRIP ESP32 38-Pin USB-C Development Board
Best for: Beginners who want more pins and a modern USB-C connector from day one

The AITRIP 38-pin board is a step up from the standard DevKit layout. The extra 8 pins compared to a 30-pin board give you more GPIO options for complex projects, and the USB-C connector is a meaningful quality-of-life upgrade if you’re already using USB-C cables for everything else on your desk.
It uses the same ESP32-WROOM-32 module as the HiLetgo, so it’s fully compatible with the same tutorials and code. The pin layout is standard and well-documented.
Specifications:
- Module: ESP32-WROOM-32
- GPIO: 38 pins
- USB: USB-C
- Same core specs as HiLetgo above
Why it stands out:
- USB-C is more durable and convenient than Micro-USB
- 38 pins gives more flexibility for projects with many sensors or outputs
- Still uses the familiar WROOM-32 module for full tutorial compatibility
- Good build quality for the price
Things to keep in mind:
- 38-pin boards can be too wide for standard breadboards — you may need a larger board or to use jumper wires instead
👉 Buy AITRIP ESP32 38-Pin on Amazon
Verdict: If you’re choosing your first ESP32 board and don’t mind the breadboard width trade-off, the USB-C connector and extra pins make this worth the small premium over a 30-pin board.
3. Best Compact ESP32 Board
Seeed Studio XIAO ESP32C3
Best for: Space-constrained projects, wearables, low-power builds, and permanent installations

The XIAO ESP32C3 is tiny — roughly the size of a thumb drive. Despite its size, it packs a full ESP32-C3 chip with Wi-Fi, Bluetooth 5.0 BLE, USB-C, and a battery charging circuit built in. The battery charging feature alone makes it stand out: you can connect a LiPo battery directly and power wireless sensor projects without any extra circuitry.
The ESP32-C3 is a single-core RISC-V variant of the ESP32 family. It has slightly less processing power than the dual-core WROOM-32 boards, but for most sensor and IoT applications, it’s more than enough.
Specifications:
- Module: ESP32-C3 (RISC-V single-core 160MHz)
- RAM: 400KB SRAM
- Flash: 4MB
- GPIO: 11 pins
- USB: USB-C (native USB)
- Wi-Fi: 802.11 b/g/n
- Bluetooth: 5.0 BLE
- Built-in battery charging circuit
Why it stands out:
- Smallest form factor on this list by a large margin
- Battery charging circuit for portable and wireless builds
- Native USB-C without a separate serial chip
- Bluetooth 5.0 BLE for modern wireless projects
- Fits directly into breadboards
Things to keep in mind:
- Only 11 GPIO pins, so not suitable for complex multi-sensor builds
- Single-core processor — not ideal for demanding tasks
- Smaller community than the WROOM-32 boards
👉 Buy Seeed Studio XIAO ESP32C3 on Amazon
Verdict: The best ESP32 board for projects that need to be small, portable, or battery-powered. Not the right first board for general learning, but exceptional for what it’s designed for.
4. Best ESP32 Board with Built-in Display
LILYGO TTGO T-Display ESP32
Best for: Projects that need a small screen without extra wiring, visual dashboards, and portable devices

The LILYGO T-Display combines a standard ESP32-WROOM-32 with a built-in 1.14-inch color TFT display — no wiring, no SPI connections, no driver setup. The display is already connected internally and works with the TFT_eSPI library out of the box.
This makes it ideal for projects where you want to show sensor readings, status information, or simple graphics without the hassle of wiring up a separate display module. Weather stations, battery monitors, cryptocurrency tickers, and custom dashboards are all natural fits.
Specifications:
- Module: ESP32-WROOM-32D
- Display: 1.14-inch IPS TFT, 135×240 resolution, 16-bit color
- GPIO: 38 accessible pins
- USB: Micro-USB
- Two programmable buttons
- Battery connector (JST 1.25mm)
Why it stands out:
- Built-in display removes a significant wiring and library headache
- IPS display has good viewing angles and bright colors
- Battery connector for portable projects
- Two onboard buttons for simple UI interactions
- Strong community with many example projects
Things to keep in mind:
- Micro-USB rather than USB-C
- Display takes up some GPIO internally, leaving fewer free pins
- Slightly more expensive than bare ESP32 boards
👉 Buy LILYGO TTGO T-Display on Amazon
Verdict: One of the most fun ESP32 boards to work with. If your project involves displaying any kind of data, this saves you significant time and money compared to buying a separate display and wiring it up.
5. Best ESP32 Board for Arduino Users
Arduino Nano ESP32
Best for: Arduino users who want ESP32 power within the familiar Arduino ecosystem

The official Arduino Nano ESP32 is Arduino’s take on the ESP32 platform, built around the ESP32-S3 chip. It fits the standard Arduino Nano form factor, which means it works with any shield or carrier board designed for the Nano. It’s fully supported in the Arduino IDE and Arduino Cloud with zero additional setup.
The ESP32-S3 is a newer and more capable chip than the standard WROOM-32. It features a dual-core 240MHz Xtensa processor, native USB, 8MB flash, and support for AI acceleration — making it genuinely future-proof for more advanced applications.
Specifications:
- Module: ESP32-S3 (dual-core 240MHz)
- RAM: 512KB SRAM + 8MB PSRAM
- Flash: 16MB
- GPIO: 30 pins (Nano compatible layout)
- USB: USB-C (native USB)
- Wi-Fi: 802.11 b/g/n
- Bluetooth: 5.0 BLE
- Arduino Cloud ready
Why it stands out:
- Official Arduino product with full IDE and Cloud integration
- Nano form factor works with existing Arduino shields and accessories
- ESP32-S3 is more powerful than the standard WROOM-32
- Native USB-C for programming and serial monitoring
- Best documentation of any ESP32 board for Arduino users
Things to keep in mind:
- Significantly more expensive than third-party ESP32 boards
- GPIO is 3.3V only — some 5V Arduino shields will not work without a logic level converter
- Slight differences from standard ESP32 boards mean some community code needs minor adjustments
👉 Buy Arduino Nano ESP32 on Amazon
Verdict: The premium option for hobbyists already invested in the Arduino ecosystem. If you want ESP32 performance without leaving the Arduino IDE, documentation, and Cloud platform, this is the cleanest path.
6. Best Budget ESP32 Multi-Pack
NodeMCU-32S Development Board (Pack of 3)
Best for: Buying in bulk, classroom use, projects where you need multiple boards, or keeping spares
The NodeMCU-32S is a 38-pin ESP32 board with a wide layout and solid build quality. Buying a pack of three brings the per-board cost down significantly, making it the best value option on this list for anyone who regularly burns through boards, teaches others, or wants to deploy multiple nodes in a sensor network.
The board itself is reliable and uses the standard WROOM-32 module, so full tutorial compatibility applies. The wider layout does have the same breadboard spacing issue as other 38-pin boards.
Why it stands out:
- Multi-pack pricing makes per-board cost very competitive
- 38-pin layout with all GPIO accessible
- Standard WROOM-32 module for full ecosystem compatibility
- Good build quality for the price point
Things to keep in mind:
- Wide layout has breadboard spacing issues
- Micro-USB rather than USB-C
- Less refined than branded alternatives
👉 Buy NodeMCU-32S 3-Pack on Amazon
Verdict: The best option when you need more than one board. The per-unit cost at pack pricing is hard to beat, and having spares on hand is genuinely useful when building multiple projects simultaneously.
Which ESP32 Board Should You Buy?
Here’s the straightforward answer based on your situation:
Complete beginner, just want to start learning: HiLetgo ESP32 DevKit. It matches more tutorials than any other board and keeps things simple.
Want a slight upgrade over the standard beginner board: AITRIP 38-pin USB-C. More pins, better connector, same tutorial compatibility.
Building something small, portable, or battery-powered: Seeed XIAO ESP32C3. Nothing else comes close at this size with these features.
Project needs a display: LILYGO T-Display. Built-in screen saves wiring, cost, and setup time.
Already comfortable with Arduino and want to stay in that ecosystem: Arduino Nano ESP32. Worth the premium for the seamless IDE and Cloud integration.
Need multiple boards or want spares: NodeMCU-32S 3-pack. Best cost per board on the list.
Getting Started with Your First ESP32
Once your board arrives, here’s the fastest way to get up and running:
Install the ESP32 board package in Arduino IDE. Open Arduino IDE, go to File → Preferences, and add this URL to the Additional Boards Manager URLs field: https://raw.githubusercontent.com/espressif/arduino-esp32/gh-pages/package_esp32_index.json.
Then go to Tools → Board → Boards Manager, search for “esp32” by Espressif, and install it.
Select the right board. For most boards on this list, select “ESP32 Dev Module” under Tools → Board. For the Arduino Nano ESP32, select “Arduino Nano ESP32”. For the XIAO ESP32C3, select “XIAO ESP32C3”.
Upload a test sketch. Start with the basic Blink example under File → Examples → 01.Basics → Blink. This confirms your board, drivers, and IDE are all working correctly before moving to Wi-Fi projects.
Try a Wi-Fi scan. Under File → Examples → WiFi → WiFiScan, this sketch lists nearby Wi-Fi networks and is the simplest proof that the wireless hardware is working.
Final Recommendation
For most people reading this, the HiLetgo ESP32 DevKit is the right starting point. It costs very little, works with virtually every tutorial online, and gives you a solid foundation to learn the ESP32 platform before branching out to more specialized boards.
Once you’ve built a few projects and know what you want to build next, the other boards on this list start to make a lot of sense — whether that’s the compact XIAO for a portable sensor, the T-Display for a visual project, or the Arduino Nano ESP32 for staying in the Arduino ecosystem.
Looking for a complete starter bundle instead of just a board? Check out our guide to the best Arduino starter kits which include boards, components, and tutorials in one box.
Need tools for your bench? See our best multimeters for electronics beginners and best soldering kits guides.