If you want your project to show sensor readings, system status, or user menus without connecting to a computer, a character LCD is the most practical way to do it. They’re cheap, well-supported, and work with almost every Arduino and ESP32 project from the first build onwards. The best LCD display for Arduino and ESP32 depends on how much text you need to show, whether you want I2C wiring or a direct parallel connection, and whether you’d rather plug a shield onto your board than wire anything at all.
This guide covers six options: three I2C character modules (16×2 and 20×4), one bare parallel 1602 for tutorial compatibility, and two LCD keypad shields for plug-and-play builds. There’s also an educational section at the end covering the HD44780 controller, I2C backpacks, address conflicts, and contrast adjustment: the things that trip up beginners and fill forum threads.
Also on ComponentAdvisor: Best OLED Displays for Arduino and ESP32 and Best Arduino Sensor Kits
Quick Comparison Table
| Display | Size | Interface | Characters | Logic | Best For |
|---|---|---|---|---|---|
| Hosyond I2C 1602 (3-pack) | 16×2 | I2C | 32 | 5V | Best overall, beginner I2C |
| SunFounder I2C 2004 | 20×4 | I2C | 80 | 5V | Best I2C 20×4 |
| DIYmalls 1602 Parallel | 16×2 | Parallel | 32 | 5V | Best for parallel tutorials |
| FREENOVE I2C 2004 | 20×4 | I2C | 80 | 5V | Best value 20×4 |
| GeeekPi I2C 1602 (2-pack) | 16×2 | I2C | 32 | 5V | Best 2-pack value |
| HiLetgo LCD Keypad Shield | 16×2 | Parallel (shield) | 32 | 5V | Best budget shield |
| DFRobot Gravity LCD Shield | 16×2 | Parallel (shield) | 32 | 5V | Best premium shield |
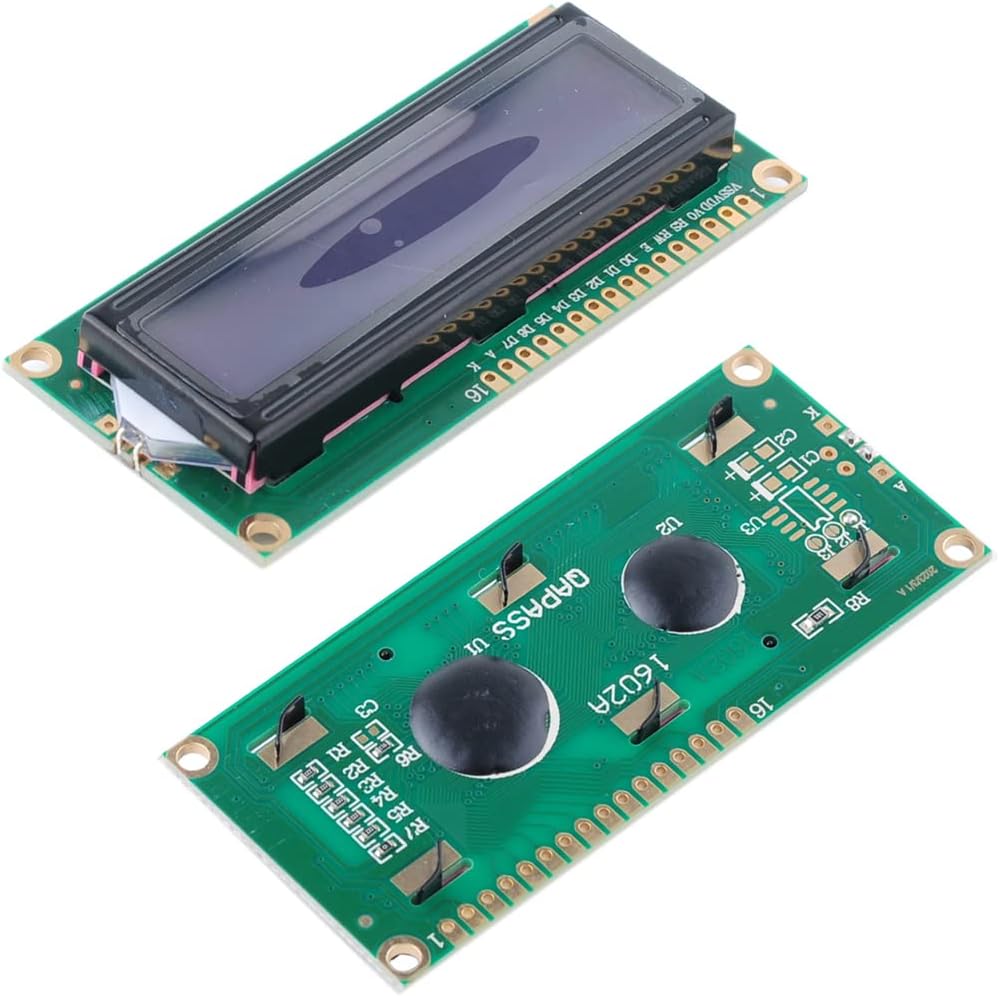
1. Best Overall: Hosyond 3pcs I2C 1602 LCD Display Module
Hosyond 3pcs I2C IIC 1602 LCD Display Module
Best for: First-time LCD builds, I2C wiring, sensor data display, and anyone who wants a reliable 16×2 with spares included.

The 1602 is the most common LCD in hobby electronics and the Hosyond 3-pack is one of the better-reviewed options on Amazon. Each module pairs an HD44780-compatible 16×2 panel with a PCF8574-based I2C backpack already soldered on, so you connect just four wires: VCC, GND, SDA, and SCL. No six-pin parallel wiring, no guessing which Arduino pins to use, no potentiometer hunting for contrast. The LiquidCrystal_I2C library handles everything in a few lines of code.
The 3-pack is the practical choice for most buyers. LCD modules are a staple of many builds, and having extras on the bench means you’re not waiting for a replacement when one gets damaged in a project. The blue backlight with white characters is the classic combination and stays readable across a wide range of ambient light. One adjustment you’ll likely need on first setup: the contrast potentiometer on the backpack ships at a default that sometimes makes characters invisible until you turn it. This is normal and takes thirty seconds to fix.
For a complete wiring and code walkthrough with this type of module, the 16×2 LCD Display with Arduino tutorial on ArduinoYard covers everything from pinout to scrolling text.
Specifications:
- Display: 16 characters x 2 rows (HD44780 compatible)
- Interface: I2C via PCF8574 backpack (pre-soldered)
- Default I2C address: 0x27 (some units 0x3F)
- Backlight: Blue with white characters
- Supply voltage: 5V
- Logic: 5V (use level shifter with 3.3V ESP32)
- Dimensions: 80 x 35mm
Why it stands out:
- I2C backpack pre-soldered, ready to wire immediately
- 3-pack gives you spares for multiple projects
- Strong library support via LiquidCrystal_I2C
- Onboard contrast potentiometer for easy adjustment
- Widely covered in tutorials, easy to find help
Things to keep in mind:
- 5V logic only, needs a level shifter for direct ESP32 use
- I2C address may vary (0x27 or 0x3F), check with I2C scanner sketch
- Backlight and contrast may need adjustment out of the box
- Not suitable for graphical content, text and custom characters only
👉 Buy Hosyond I2C 1602 LCD 3-Pack on Amazon
Verdict: The right starting point for most people. The I2C wiring is simple, the library is well-documented, and the 3-pack price makes it easy to stock up. If you’ve never used an LCD before, start here.
2. Best I2C 20×4: SunFounder I2C 2004 20×4 LCD Module
SunFounder IIC I2C TWI Serial 2004 20×4 LCD Module
Best for: Projects that need to display more than two lines of text: sensor dashboards, menus, status panels, and data loggers.

The 20×4 gives you 80 characters across four rows instead of 32 across two. That sounds like a small difference until you’re trying to display temperature, humidity, pressure, and a timestamp on the same screen and running out of space on a 1602. The SunFounder 2004 is one of the most reviewed 20×4 modules on Amazon, uses the same I2C interface and PCF8574 backpack as the 1602, and works with the same LiquidCrystal_I2C library. Code you write for a 1602 transfers to a 2004 with two number changes.
SunFounder’s documentation is better than most budget module brands. They maintain tutorials and example code that are worth reading alongside the generic library documentation. The module is physically larger than a 1602, roughly the footprint of an Arduino Uno, so check your enclosure dimensions if you’re building something compact. The blue backlight is bright and consistent across the panel, which is not always the case with cheaper alternatives.
Specifications:
- Display: 20 characters x 4 rows (HD44780 compatible)
- Interface: I2C via PCF8574 backpack (pre-soldered)
- Default I2C address: 0x27
- Backlight: Blue with white characters
- Supply voltage: 5V
- Logic: 5V (use level shifter with 3.3V ESP32)
- Dimensions: 98 x 60mm
Why it stands out:
- 80-character display area covers most multi-sensor projects
- Same I2C library as 1602, near-zero learning curve to switch
- SunFounder has better documentation than generic brands
- Consistent backlight quality across the panel
- Very well-reviewed, reliable sourcing from SunFounder
Things to keep in mind:
- Physically larger than a 1602, check enclosure fit
- 5V logic, needs level shifter for 3.3V ESP32
- More expensive than a 1602 for the same character density per row
- Overkill if you only need two lines of output
👉 Buy SunFounder I2C 2004 20×4 LCD on Amazon
Verdict: The best step up from a 1602 when you need more display space. The SunFounder branding adds documentation value and the I2C interface means no extra wiring complexity over the smaller module.
3. Best for Parallel Tutorials: DIYmalls 1602 LCD Module (No I2C)
DIYmalls 16×2 1602 LCD Display Module (Parallel Interface)
Best for: Following tutorials that use the parallel LiquidCrystal library directly, or learning how LCD modules actually work before adding an I2C backpack.
Most LCD tutorials published before around 2018, and plenty since, use the parallel interface: six Arduino pins (RS, EN, D4, D5, D6, D7) connected directly to the LCD, with a potentiometer on pin 3 for contrast. The Arduino LiquidCrystal library was written for this exact setup and it’s still the reference implementation in the official Arduino documentation. If you’re following an older tutorial, a book, or a course that uses this wiring, a bare 1602 module without an I2C backpack is what you need.
The DIYmalls 4-pack is good value and the modules are solid. There’s also a practical case for understanding the parallel interface: it teaches you what the I2C backpack is actually abstracting, which helps when things go wrong. The downside is pin usage: six digital pins plus power and ground versus two for I2C. For most Uno builds that’s not a problem, but on pin-constrained projects you’ll want to add an I2C backpack later.
Specifications:
- Display: 16 characters x 2 rows (HD44780 compatible)
- Interface: Parallel (6 data/control pins)
- Controller: AIP31066 (HD44780 compatible)
- Backlight: Blue with white characters
- Supply voltage: 5V
- Pack: 4 modules
- No I2C backpack included
Why it stands out:
- Compatible with Arduino’s built-in LiquidCrystal library, no extra install
- Matches the wiring in most published beginner tutorials
- 4-pack gives good value and plenty of spares
- Useful for learning the fundamentals before moving to I2C
Things to keep in mind:
- Uses 6 Arduino digital pins, leaves fewer free for other components
- Requires a 10k potentiometer for contrast (often not included)
- No I2C, not as convenient as backpack modules for most projects
- You can add an I2C backpack separately for about $1–2 if needed later
👉 Buy DIYmalls 1602 Parallel LCD 4-Pack on Amazon
Verdict: The right pick if you’re following a parallel-interface tutorial or want to understand how these modules work at the pin level. For new projects with no tutorial constraints, the I2C versions are more practical.
4. Best Value 20×4: FREENOVE I2C 2004 LCD Module
FREENOVE I2C IIC LCD 2004 Module, TWI Serial 20×4 Display
Best for: 20×4 projects where you want strong library support and a brand known for beginner-friendly documentation.
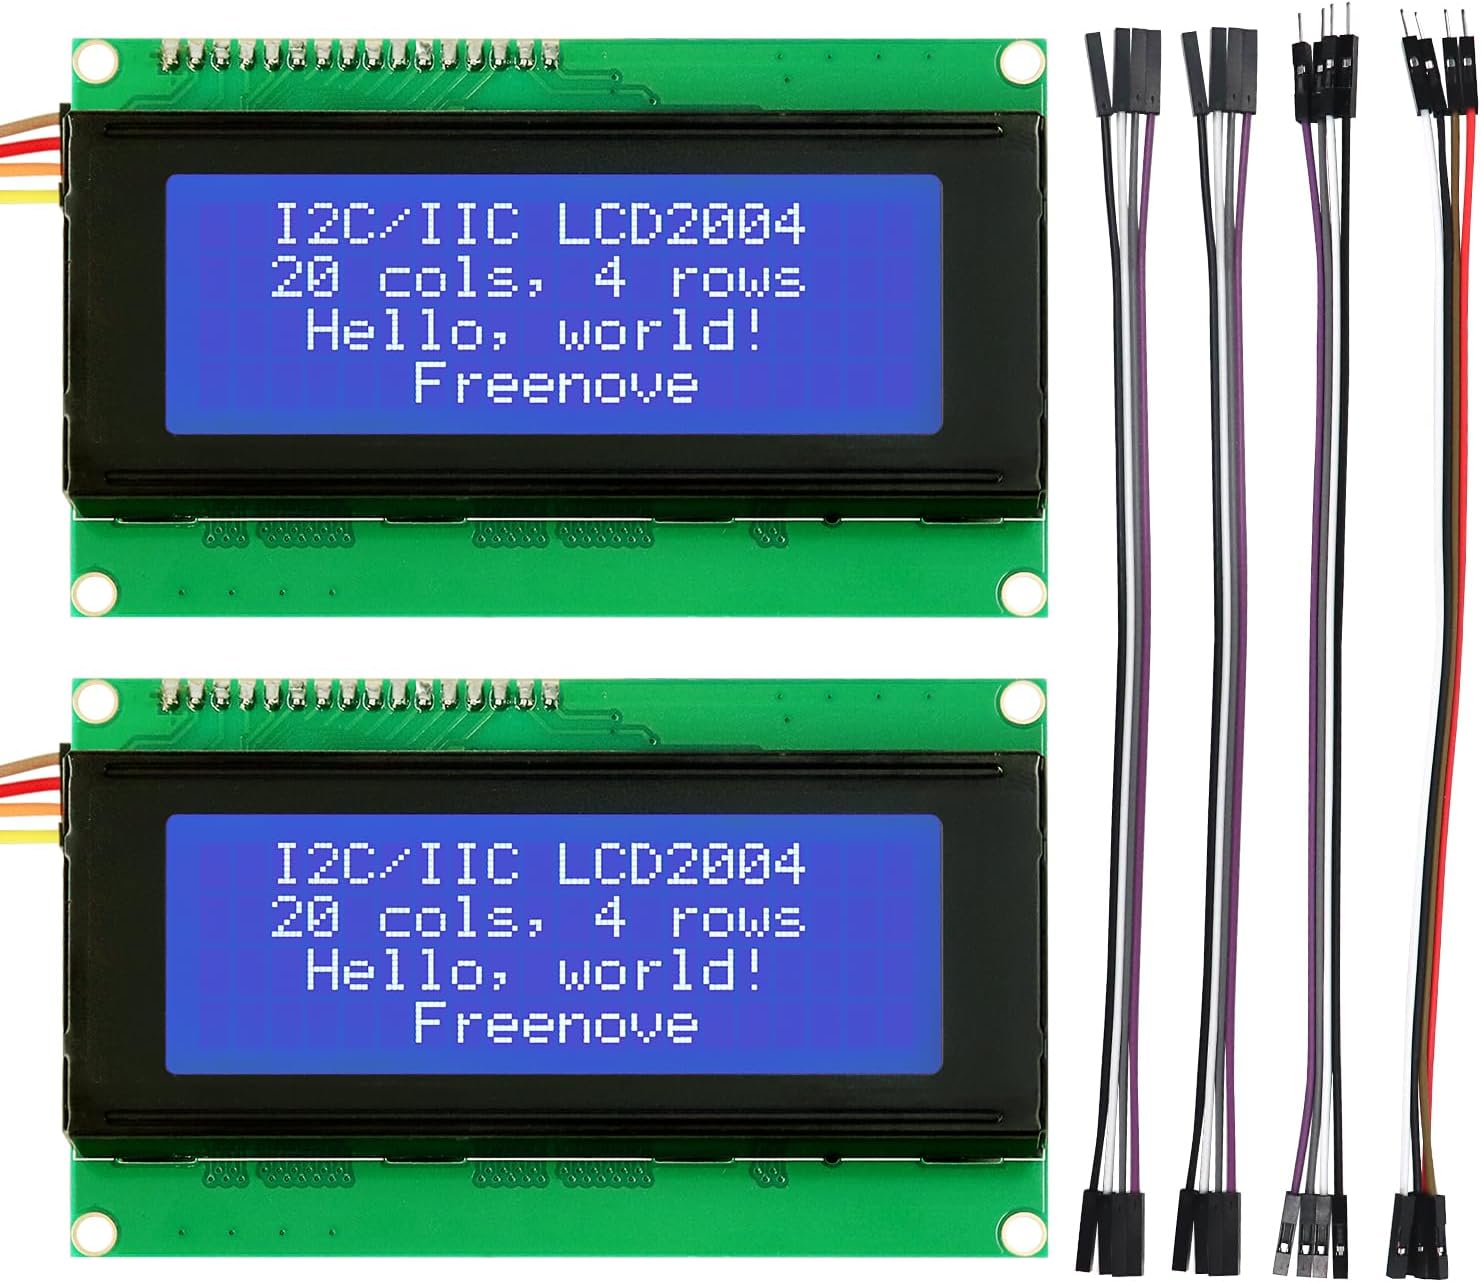
FREENOVE is one of the more beginner-friendly brands in the Arduino ecosystem: their starter kits are widely recommended and they put real effort into documentation. The 2004 LCD module follows the same I2C backpack design as the SunFounder, uses the PCF8574 expander at address 0x27, and works with LiquidCrystal_I2C. Where FREENOVE stands out is their companion documentation: they include links to tutorials and code examples that are consistently well-written and maintained.
Compared to the SunFounder 2004, the FREENOVE is typically a few dollars cheaper and performs comparably. Both modules use the same controller and interface. If you already own FREENOVE hardware or have used their tutorials before, sticking with the brand makes the learning curve slightly smoother. If you’re deciding between the two purely on specs, either works well.
Specifications:
- Display: 20 characters x 4 rows (HD44780 compatible)
- Interface: I2C via PCF8574 backpack (pre-soldered)
- Default I2C address: 0x27
- Backlight: Blue with white characters
- Supply voltage: 5V
- Logic: 5V (use level shifter with 3.3V ESP32)
- Tutorial links included in product listing
Why it stands out:
- FREENOVE documentation is among the best for beginner hardware
- Typically priced slightly below the SunFounder equivalent
- Same I2C interface and library as every other PCF8574-based module
- Good build quality for the price point
Things to keep in mind:
- 5V logic, needs level shifter for ESP32
- No functional advantage over the SunFounder version at the spec level
- Larger footprint than a 1602, same caveat about enclosure space
👉 Buy FREENOVE I2C 2004 20×4 LCD on Amazon
Verdict: A strong alternative to the SunFounder 2004, especially if you’re already in the FREENOVE ecosystem. The documentation quality gives it a slight edge for complete beginners choosing between the two.
5. Best 2-Pack Value: GeeekPi I2C 1602 LCD Module (2-Pack)
GeeekPi 2-Pack I2C 1602 LCD Display Module
Best for: Buyers who need two 16×2 displays for the same project, or want a reliable 1602 pair at a competitive price.

The GeeekPi 1602 is another well-reviewed I2C character module that consistently appears near the top of Amazon’s LCD bestseller lists. The 2-pack format suits projects where you need two independent displays: think a two-zone temperature monitor, a project with a main status screen and a secondary input display, or simply buying two for two different builds at once. The module uses the same PCF8574 backpack and I2C interface as the Hosyond, with the same default address of 0x27.
One practical note for multi-display builds: if you wire two I2C LCDs to the same Arduino or ESP32, they need different I2C addresses. The PCF8574 address is set by three solder jumpers (A0, A1, A2) on the backpack. By default both modules will be 0x27, so you’ll need to bridge one jumper on one module to change it to 0x26 or 0x25. This is a five-minute soldering job but worth knowing before you buy.
Specifications:
- Display: 16 characters x 2 rows (HD44780 compatible)
- Interface: I2C via PCF8574 backpack (pre-soldered)
- Default I2C address: 0x27 (adjustable via solder jumpers)
- Backlight: Blue with white characters (yellow version also available)
- Supply voltage: 5V
- Pack: 2 modules
Why it stands out:
- 2-pack is practical for dual-display projects or two separate builds
- Consistent reviews and reliable sourcing from GeeekPi
- Address-adjustable via solder jumpers for multi-display setups
- Yellow backlight variant available if you prefer warmer contrast
Things to keep in mind:
- Two modules at 0x27 by default: change one address for dual-display use
- 5V logic, same ESP32 level-shifter caveat as other modules
- No functional advantage over the Hosyond for single-display builds
👉 Buy GeeekPi I2C 1602 LCD 2-Pack on Amazon
Verdict: The practical pick when you specifically need two 1602 modules. The address-adjustable backpack makes dual-display builds possible without extra hardware beyond a quick solder bridge.
6. Best Budget Shield: HiLetgo 1602 LCD Keypad Shield
HiLetgo LCD 1602 Keypad Shield for Arduino
Best for: Arduino Uno and Mega builds where you want a display and input buttons with no wiring required.

The LCD keypad shield stacks directly onto an Arduino Uno or Mega and gives you a 16×2 display plus five navigation buttons (Select, Up, Down, Left, Right) and a Reset button in a single plug-in unit. No breadboard, no wiring, no soldering. For projects that need a simple menu system (settings screens, control panels, data display with navigation), this is the fastest path from idea to working hardware.
The HiLetgo version is the budget option at roughly half the price of the DFRobot alternative. It uses a parallel interface internally (the shield connects the LCD data lines to specific Arduino digital pins), so the code uses the standard LiquidCrystal library with fixed pin assignments. The buttons share a single analog pin through a resistor ladder and are read with analogRead(). This is a common and well-documented approach, with plenty of example code available. The main limitation is Arduino-only: the shield pin layout doesn’t map to ESP32 boards.
Specifications:
- Display: 16 characters x 2 rows (HD44780 compatible)
- Interface: Parallel (shield, fixed pin mapping)
- Buttons: 5 navigation + 1 reset, read via analog pin A0
- Backlight: Blue with white characters
- Supply voltage: 5V Arduino
- Compatible: Arduino Uno, Mega, Duemilanove
- Library: Standard LiquidCrystal (no extra install)
Why it stands out:
- Zero wiring, plugs directly onto Arduino
- Includes navigation buttons for menu-driven projects
- Uses standard LiquidCrystal library, no extra library install
- Very low cost, good for quickly prototyping interactive interfaces
Things to keep in mind:
- Arduino-only in shield form, not compatible with ESP32
- Fixed pin mapping occupies most of Arduino’s digital pins
- Buttons share one analog pin, only one can be read at a time
- Build quality is functional but basic at this price point
👉 Buy HiLetgo 1602 LCD Keypad Shield on Amazon
Verdict: The fastest way to add a display and user input to an Arduino project without touching a breadboard. For the price it’s a useful tool, and the button input via analog pin is a clever design that works reliably with good example code.
7. Best Premium Shield: DFRobot Gravity 1602 LCD Keypad Shield
DFRobot Gravity: 1602 LCD Keypad Shield for Arduino (DFR0009)
Best for: Arduino builds where you want better build quality, proper documentation, and a shield from a trusted hardware brand.

DFRobot is one of the most respected names in the Arduino hardware space, and their Gravity 1602 keypad shield reflects that. Same concept as the HiLetgo version: 16×2 display, five navigation buttons, plugs directly onto Arduino, but built to a noticeably higher standard. The PCB quality, connector fit, and backlight uniformity are all better. DFRobot also maintains proper documentation for this shield including schematics, pin mapping tables, and working example code, which is not guaranteed with budget clones.
The Gravity branding means it’s part of DFRobot’s standardised connector ecosystem, useful if you’re building a larger project with other DFRobot Gravity sensors. The button layout and analog reading method are identical to the HiLetgo version, so code written for one works on the other. If you’re building something that will live in an enclosure long-term, or teaching a class where reliability matters, the DFRobot is worth the extra cost.
Specifications:
- Display: 16 characters x 2 rows (HD44780 compatible)
- Interface: Parallel (shield, fixed pin mapping)
- Buttons: 5 navigation + 1 reset, read via analog pin A0
- Backlight: Blue with white characters
- Supply voltage: 5V Arduino
- Compatible: Arduino Uno, Mega, Leonardo, Due
- Library: Standard LiquidCrystal
- Full schematics and documentation available from DFRobot
Why it stands out:
- DFRobot build quality and documentation well above budget alternatives
- Full schematics and maintained example code
- Part of the Gravity connector ecosystem for broader DFRobot builds
- More reliable backlight uniformity and connector fit
Things to keep in mind:
- Arduino-only, same limitation as the HiLetgo shield
- Significantly more expensive than the HiLetgo version for the same functionality
- Fixed pin mapping uses most of Arduino’s digital pins
👉 Buy DFRobot Gravity 1602 LCD Keypad Shield on Amazon
Verdict: The right choice when build quality and documentation matter more than price. For permanent projects, teaching setups, or if you’re already using DFRobot hardware, the premium is justified.
Which LCD Display Should You Buy?
For most first builds, the Hosyond I2C 1602 3-pack is the right call. Four wires, one library, plenty of tutorials, and you get spares. If you find yourself needing more display area for sensor dashboards or multi-line menus, move to the SunFounder 2004 or FREENOVE 2004: both are equally capable, with SunFounder having a slight edge in documentation breadth and FREENOVE being the better pick if you’re already in their ecosystem.
If you’re following a tutorial that uses the parallel interface and you don’t want to rework the wiring, the DIYmalls parallel 1602 is the right module to buy. You can always add an I2C backpack module later for a dollar or two if you want to free up pins.
For dual-display builds, the GeeekPi 2-pack saves you sourcing two separate modules, and the solder-jumper address configuration makes running two LCDs on the same bus straightforward.
If wiring isn’t something you want to deal with and you’re on Arduino, the HiLetgo keypad shield gets you a working display with navigation buttons in seconds. Step up to the DFRobot Gravity shield if you want better build quality and proper documentation for a long-term project.
HD44780, I2C Backpacks, and What to Know Before You Wire
Almost every character LCD module in this guide uses the HD44780 controller, a chip Hitachi introduced in 1987 that became the industry default for character displays. It defines the instruction set, the character ROM, and the parallel interface that all these modules share. When you call lcd.print("Hello") in your code, the LiquidCrystal library is sending HD44780 commands over whichever interface you’re using.
The native interface is parallel: up to 8 data lines (or 4 in nibble mode) plus RS, RW, and EN control signals. That works fine but uses 6 Arduino pins minimum. The I2C backpack solves this by adding a PCF8574 I/O expander chip between the microcontroller and the LCD. The PCF8574 receives I2C commands on just SDA and SCL, then drives the LCD parallel lines internally. You lose a little speed, which doesn’t matter for character displays, and gain simplicity: two wires instead of six, and the ability to put up to eight LCD modules on the same I2C bus by changing the address jumpers.
I2C address conflicts are the most common problem people hit when adding an LCD to an existing project. The PCF8574 defaults to 0x27 on most modules (some ship at 0x3F, depending on the chip variant). If you already have another 0x27 device on your I2C bus, the LCD won’t respond correctly. Run a short I2C scanner sketch on your Arduino or ESP32 first to see what addresses are in use, then use the A0/A1/A2 solder jumpers on the backpack to shift the LCD to an unused address between 0x20 and 0x27.
Contrast adjustment catches a lot of beginners. The potentiometer on the I2C backpack sets the voltage on the LCD’s V0 pin, which controls character contrast. Out of the box it’s often set too high or too low, making characters either invisible or barely visible. Power the module, run a simple lcd.print("test") sketch, and turn the potentiometer slowly until the characters appear clearly. This is always the first thing to check if your LCD seems dead but the backlight is on.
ESP32 compatibility deserves a specific note. The ESP32 runs at 3.3V logic and the HD44780 modules in this guide are 5V logic. In most cases the I2C pull-ups on the ESP32 are enough to drive the PCF8574 reliably, but for guaranteed compatibility, especially in production builds, use an I2C level shifter between the ESP32 and the LCD module. For quick prototyping, many people connect directly and it works, but it’s technically out of spec.
Final Recommendation
For a first LCD project, the Hosyond I2C 1602 3-pack is the most practical starting point: simple wiring, strong tutorial coverage, and the pack format means you’ll have modules ready for the next project too. When you need more screen space, the SunFounder 2004 is the natural upgrade with no change to your code or wiring approach.
For hands-on learning about how these displays actually work, the DIYmalls parallel 1602 is worth spending time with before relying on I2C abstraction for everything.
To go further with LCD projects, the 16×2 LCD Display with Arduino tutorial on ArduinoYard covers wiring, the LiquidCrystal library, custom characters, and scrolling text with working code examples. If your project eventually needs a graphical colour display rather than character output, the ILI9341 TFT Display with ESP32 guide on ArduinoYard covers the next step up.
Related on ComponentAdvisor: Best OLED Displays for Arduino and ESP32 · Best Arduino Sensor Kits · Best Breadboard and Jumper Wire Kit · Best Arduino Starter Kits