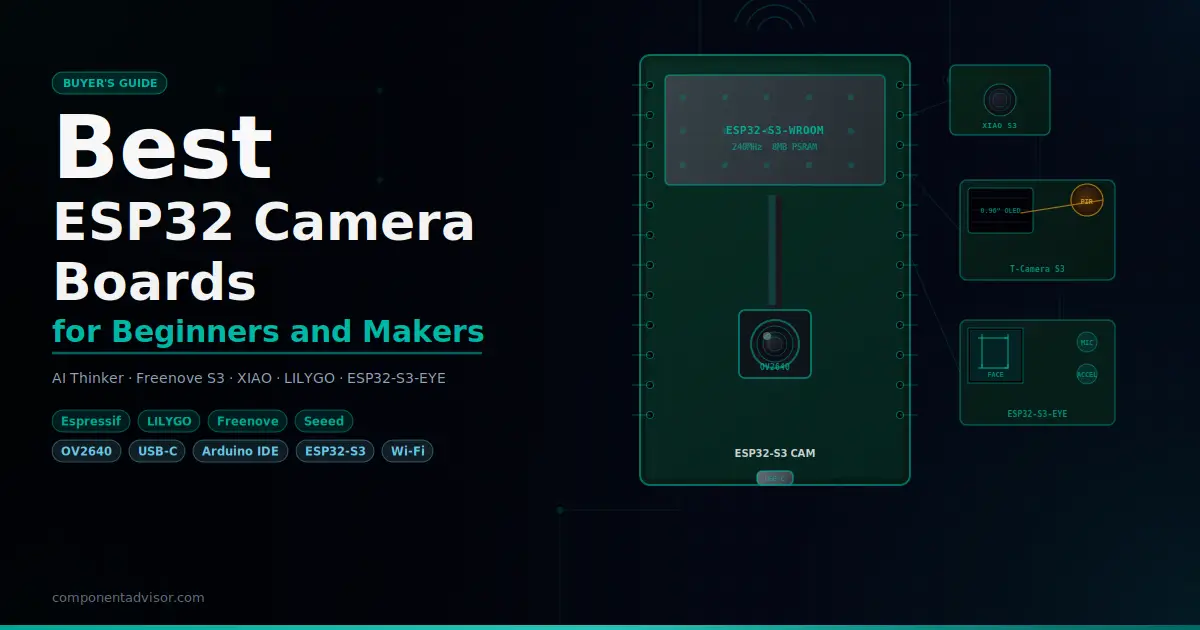
If you want to add a wireless camera to a project without a Raspberry Pi, an ESP32 camera board is the most practical way to do it. The best ESP32 camera board for your project depends on what you’re actually building, because these boards vary a lot more than most people expect. You’ve got stripped-down budget modules that need a separate programmer, modern ESP32-S3 boards with native USB and more memory than the original ESP32 could dream of, a stamp-sized board built for wearables, and an official Espressif board with face detection built into its example sketches.
This guide covers six of the most useful ESP32 camera boards available on Amazon, from the classic AI Thinker module to the Espressif ESP32-S3-EYE. Each section includes real specs, honest notes about Arduino IDE compatibility, and clear guidance on which projects each board is actually suited for. There’s also an educational section covering the two big topics that trip people up: ESP32 vs ESP32-S3, and why PSRAM matters more than almost anything else.
Also worth reading before you buy: our guides to the Best ESP32 Development Boards and Best ESP32 Starter Kits on ComponentAdvisor.
Quick Comparison Table
| Board | Chip | Camera | PSRAM | USB | Arduino IDE | Best For |
|---|---|---|---|---|---|---|
| Aideepen ESP32-CAM-MB | ESP32-S (LX6) | OV2640 2MP | 4MB | Micro-USB (via MB board) | Yes | Budget first project |
| Freenove ESP32-S3 CAM | ESP32-S3 (LX7) | OV2640 2MP | 8MB | USB-C | Yes | Best beginner standalone board |
| Seeed XIAO ESP32S3 Sense | ESP32-S3 (LX7) | OV2640 2MP | 8MB | USB-C | Yes | Compact, wearables, edge ML |
| LILYGO T-Camera S3 | ESP32-S3 (LX7) | OV2640 2MP | 8MB | USB-C | Partial* | OLED + PIR, security camera |
| Espressif ESP32-S3-EYE | ESP32-S3 (LX7) | OV2640 2MP | 8MB | Micro-USB | Yes | Face detection, AI projects |
| Freenove Ultimate Starter Kit | ESP32-WROVER (LX6) | OV2640 2MP | 8MB | USB (onboard) | Yes | Complete learning kit |
*LILYGO T-Camera S3 requires library file setup and ESP32 core v2.0.17 for full functionality in Arduino IDE.
1. Best Budget ESP32 Camera Board: Aideepen ESP32-CAM-MB
Aideepen ESP32-CAM with MB Programmer Board
Best for: Getting started with ESP32 camera projects on the tightest budget, with everything you need to upload code included.

The original AI Thinker ESP32-CAM is the board that put ESP32 camera projects on the map. It’s been in starter kits and tutorials for years, and for good reason: it’s cheap, it works, and there are more tutorials, example projects, and community Q&As for this exact board than any other ESP32 camera module. The Aideepen kit includes both the ESP32-CAM board and the MB programmer board that stacks underneath it, which is the version you actually want.
Here’s why the MB board matters. The bare ESP32-CAM has no USB port and no onboard programmer. Without the MB board, you’d need a separate FTDI adapter and a specific wiring sequence to put it into flash mode before every upload. The MB board adds a CH340G USB-to-serial chip, a dedicated BOOT button, and a RESET button, which turns uploading into a one-cable process just like any other Arduino board. Connect the micro-USB cable, open Arduino IDE, select “AI Thinker ESP32-CAM” from the board manager, and upload. The CameraWebServer example sketch in File > Examples > ESP32 > Camera works out of the box with this board.
One honest note: the PSRAM on the ESP32-CAM is 4MB, and older AI Thinker boards had just 2MB. The Aideepen listing specifies 4MB, which is enough for SVGA and XGA streaming but will struggle at full UXGA (1600×1200) resolution. For most beginner projects, streaming at VGA or SVGA quality, this is completely fine. For high-resolution surveillance or photo capture to an SD card, you’ll want more PSRAM.
Specifications:
- Chip: ESP32-S (dual-core LX6, 240 MHz)
- Camera: OV2640 2MP, up to 1600×1200 (UXGA)
- PSRAM: 4MB external
- Flash: 4MB
- Wi-Fi: 802.11 b/g/n, 2.4 GHz
- Bluetooth: 4.2 BR/EDR + BLE
- MicroSD card slot: Yes (up to 4GB)
- Flash LED: Built-in
- USB: Micro-USB (via MB programmer board, CH340G)
- GPIOs available: 10 (limited due to camera/SD pin usage)
Why it stands out:
- More tutorials and example projects than any other board here
- MB programmer board eliminates the FTDI adapter headache
- Onboard BOOT and RESET buttons for clean uploads
- MicroSD slot for saving images and video locally
- Runs the full
CameraWebServerexample including face detection in Arduino IDE
Things to keep in mind:
- 4MB PSRAM, less than the S3-based boards, limits high-resolution streaming stability
- ESP32-S chip, not S3, so no vector instructions for AI/ML workloads
- Micro-USB, not USB-C
- Only 10 usable GPIOs, and the SD card and camera share some of them
- GPIO0 must be connected to GND during power-up if you brick it and need a manual flash
👉 Buy Aideepen ESP32-CAM-MB on Amazon
Verdict: The Aideepen ESP32-CAM-MB is the best starting point if budget is the primary concern. It costs less than almost anything else here, the MB board makes uploads painless, and you’ll find answers to every question you have in under five minutes of searching. For your first camera project, it’s hard to argue against it.
2. Best Standalone Beginner Board: Freenove ESP32-S3 CAM Board
Freenove ESP32-S3 WROOM CAM Board
Best for: Beginners who want a modern ESP32-S3 board with USB-C, generous memory, and excellent documentation, without buying a full kit.

Freenove has built a strong reputation in the Arduino and ESP32 community for producing boards with genuinely useful documentation, and the ESP32-S3 CAM board is their current camera flagship. It’s built around the ESP32-S3-WROOM module with 8MB PSRAM and either 8MB or 16MB Flash (depending on the variant you buy), USB-C for programming and power, a WS2812b RGB LED for flash, a microSD card slot, and an OV2640 camera. No external programmer needed.
What separates this from the Aideepen isn’t just the newer chip. The ESP32-S3’s dual LX7 cores run noticeably faster than the LX6, and the 8MB PSRAM means stable streaming at higher resolutions. You can stream UXGA video reliably, which isn’t really possible on the 4MB ESP32-CAM. The Freenove also gives you more accessible GPIO pins since it’s not shoehorning everything into the smallest possible footprint.
Arduino IDE setup takes about five minutes. Select “ESP32S3 Dev Module” from the boards manager, set PSRAM to “OPI PSRAM” and Flash size to 8MB (or 16MB depending on your variant), and the standard ESP32 camera examples work. Freenove provides downloadable tutorials at freenove.com with C and MicroPython examples specifically for this board. If you get stuck, the examples are well commented and there’s active community support.
The RGB flash LED is worth mentioning: it’s software-controlled and can serve as both a camera illumination LED and a general status indicator in your projects, which is a nice touch over the single fixed white LED on the AI Thinker.
Specifications:
- Chip: ESP32-S3-WROOM (dual-core LX7, 240 MHz, vector instructions)
- Camera: OV2640 2MP, up to 1600×1200 (UXGA)
- PSRAM: 8MB OPI
- Flash: 8MB or 16MB (variant dependent)
- Wi-Fi: 802.11 b/g/n, 2.4 GHz
- Bluetooth: 5.0 LE
- MicroSD card slot: Yes (1GB card included)
- Flash: WS2812b RGB LED
- USB: USB-C (native USB + onboard CH340 programmer)
- Operating voltage: 5V via USB-C or 3.3V pin
Why it stands out:
- 8MB PSRAM enables stable UXGA streaming and higher frame buffers
- USB-C, no external programmer needed
- Freenove’s downloadable tutorial covers camera web server, video streaming, and more
- RGB flash LED is more versatile than a fixed white LED
- Supports both C (Arduino IDE) and MicroPython
- More accessible GPIO pins than the ESP32-CAM AI Thinker design
Things to keep in mind:
- Board selection in Arduino IDE is “ESP32S3 Dev Module,” not a dedicated Freenove entry
- PSRAM type setting matters: must be set to “OPI PSRAM” or you’ll get PSRAM init failures
- Tutorial is download-only, no paper manual
- Slightly more expensive than the Aideepen ESP32-CAM
👉 Buy Freenove ESP32-S3 CAM Board on Amazon
Verdict: This is the board I’d recommend to most beginners who want a standalone camera module in 2025. The documentation is better than average, the S3 chip gives you headroom for more complex projects, and USB-C means you’ll never scramble for a micro-USB cable again. It’s a clean step up from the AI Thinker without jumping into intermediate territory.
3. Best Compact and Wearable Camera: Seeed Studio XIAO ESP32S3 Sense
Seeed Studio XIAO ESP32S3 Sense
Best for: Projects where size matters: wearables, small enclosures, robots, and anyone interested in on-device machine learning.

The XIAO ESP32S3 Sense is genuinely tiny: 21mm x 17.5mm, roughly the size of a large postage stamp. Despite its size, it packs an ESP32-S3 with 8MB PSRAM, 8MB Flash, a detachable OV2640 camera module, a digital microphone, a microSD card slot, a battery charging circuit, and USB-C. The camera is a separate snap-on module that connects via FPC, which means you can remove it when you don’t need it and still use the base board for non-camera projects.
Arduino IDE support is clean. The CAMERA_MODEL_XIAO_ESP32S3 definition is built into the official ESP32 Arduino core CameraWebServer example. Select “XIAO_ESP32S3” from Tools > Board, uncomment the XIAO model in the sketch, and upload. Face detection via the web interface works because the S3’s PSRAM provides enough buffer space. The board can also run face recognition models via Seeed’s SenseCraft AI platform, a browser-based no-code tool that deploys pre-trained TinyML models directly to the board over USB with zero code required.
One well-documented issue: the XIAO gets warm during sustained video streaming. Not alarmingly hot, but noticeably warm. Seeed sells small heatsinks for the back of the board and recommends using one for continuous streaming applications. Worth keeping in mind if you’re building a compact enclosure with limited airflow.
The battery charging circuit is a significant advantage for portable builds. Connect a single-cell LiPo battery via the onboard JST connector and you have a self-contained wireless camera that charges via USB-C. No external charging module needed.
Specifications:
- Chip: ESP32-S3R8 (dual-core LX7, 240 MHz, vector extensions)
- Camera: OV2640 2MP (detachable module), up to 1600×1200
- PSRAM: 8MB OPI
- Flash: 8MB
- Microphone: PDM digital microphone (onboard)
- MicroSD: Yes (on camera module)
- Wi-Fi: 802.11 b/g/n, 2.4 GHz
- Bluetooth: 5.0 LE
- USB: USB-C (native USB)
- Battery: JST connector + onboard LiPo charge management
- Dimensions: 21mm x 17.5mm
Why it stands out:
- Smallest board in this lineup by a wide margin
- Detachable camera module means the base board is still usable alone
- Onboard battery charging, ready for portable/wearable builds out of the box
- Digital microphone onboard, no extra hardware for audio+video projects
- SenseCraft AI enables no-code face detection and object recognition
Things to keep in mind:
- Gets warm during sustained streaming, heatsink recommended
- Tiny buttons require something non-conductive (like a toothpick) to press reliably
- Camera module connector is fragile, handle with care when attaching/detaching
- Horizontal mirror effect by default in CameraWebServer, fixable in software
👉 Buy Seeed XIAO ESP32S3 Sense on Amazon
Verdict: If your project has a space constraint or needs a battery-powered wireless camera, the XIAO ESP32S3 Sense is the obvious choice. It’s the smallest capable ESP32-S3 camera board you can buy, and the built-in charging circuit saves you from adding a TP4056 module to your build. For anything that needs to fit in a small enclosure, this is where to start.
4. Best for Security Camera Projects: LILYGO T-Camera S3
LILYGO T-Camera S3
Best for: Motion-triggered security cameras, doorbell cameras, and projects where you want a camera, display, and motion sensor already on one board.

The LILYGO T-Camera S3 is the most purpose-built board in this lineup. It combines an ESP32-S3FN16R8 (16MB Flash, 8MB PSRAM) with an OV2640 camera, a 0.96-inch SSD1306 OLED display, a PIR motion sensor, a digital microphone, a battery connector with power management (PMU), and USB-C on a compact board measuring 69 x 28mm. That’s everything you’d normally wire up separately for a motion-activated camera project, integrated on a single board.
The PIR sensor is the killer feature here. It connects directly to the ESP32-S3 via GPIO, so you can write code that wakes the board from deep sleep when motion is detected, captures an image or starts streaming, displays status on the OLED, and sends a notification via Wi-Fi or Telegram. That’s a complete security camera use case handled entirely by this one board, without a breadboard in sight.
The honest caveat for beginners: this board requires more setup in Arduino IDE than the others. LILYGO’s example code uses the T-Camera S3’s custom library, which you need to manually download from their GitHub repository and copy into your Arduino libraries folder. Additionally, the current ESP32 Arduino core (v3.x) has compatibility issues with this board’s examples, and LILYGO’s documentation recommends downgrading to v2.0.17. This is a real barrier for beginners who aren’t comfortable managing IDE versions and library files. Once it’s configured correctly, it works well, but it’s not as plug-and-play as the Freenove or XIAO boards.
For intermediate users who are comfortable with a bit of IDE setup, the T-Camera S3 is excellent. The pre-integrated hardware genuinely simplifies project builds, and the reviews from makers who got it working are positive.
Specifications:
- Chip: ESP32-S3FN16R8 (dual-core LX7, 240 MHz)
- Camera: OV2640 2MP, UXGA (optional OV5640 5MP upgrade available)
- PSRAM: 8MB
- Flash: 16MB
- Display: 0.96-inch SSD1306 OLED, 128×64 pixels
- PIR sensor: Yes (motion detection)
- Microphone: Yes
- Battery: JST connector + PMU (power management chip)
- Wi-Fi: 802.11 b/g/n
- Bluetooth: 5.0 + BT Mesh
- USB: USB-C
- Dimensions: 69 x 28 x 18.5mm
Why it stands out:
- Onboard PIR sensor is a genuine differentiator for security/surveillance projects
- OLED display for local status feedback without additional wiring
- 16MB Flash gives more room for complex applications
- PMU chip provides clean power management and battery protection
- OV5640 5MP camera upgrade available as an option
Things to keep in mind:
- Requires LILYGO’s custom library files to be manually installed
- ESP32 core v3.x compatibility issues, v2.0.17 recommended
- PMU requires 6-second hold on PWRKEY to power off (intentional design)
- More setup friction than other boards in this lineup
- Some users report camera image quality issues without proper lens focus adjustment
👉 Buy LILYGO T-Camera S3 on Amazon
Verdict: If you want a motion-activated camera with a display and don’t want to build it from separate components, the T-Camera S3 is the right board. The hardware combination is excellent. Just go in knowing you’ll spend more time on IDE setup than with any other board here, and check that you’re using ESP32 core v2.0.17 before you start.
5. Best for AI and Face Detection: Espressif ESP32-S3-EYE
Espressif ESP32-S3-EYE Development Board
Best for: Face detection projects, on-device AI/ML experimentation, and makers who want Espressif’s own reference design with official support.
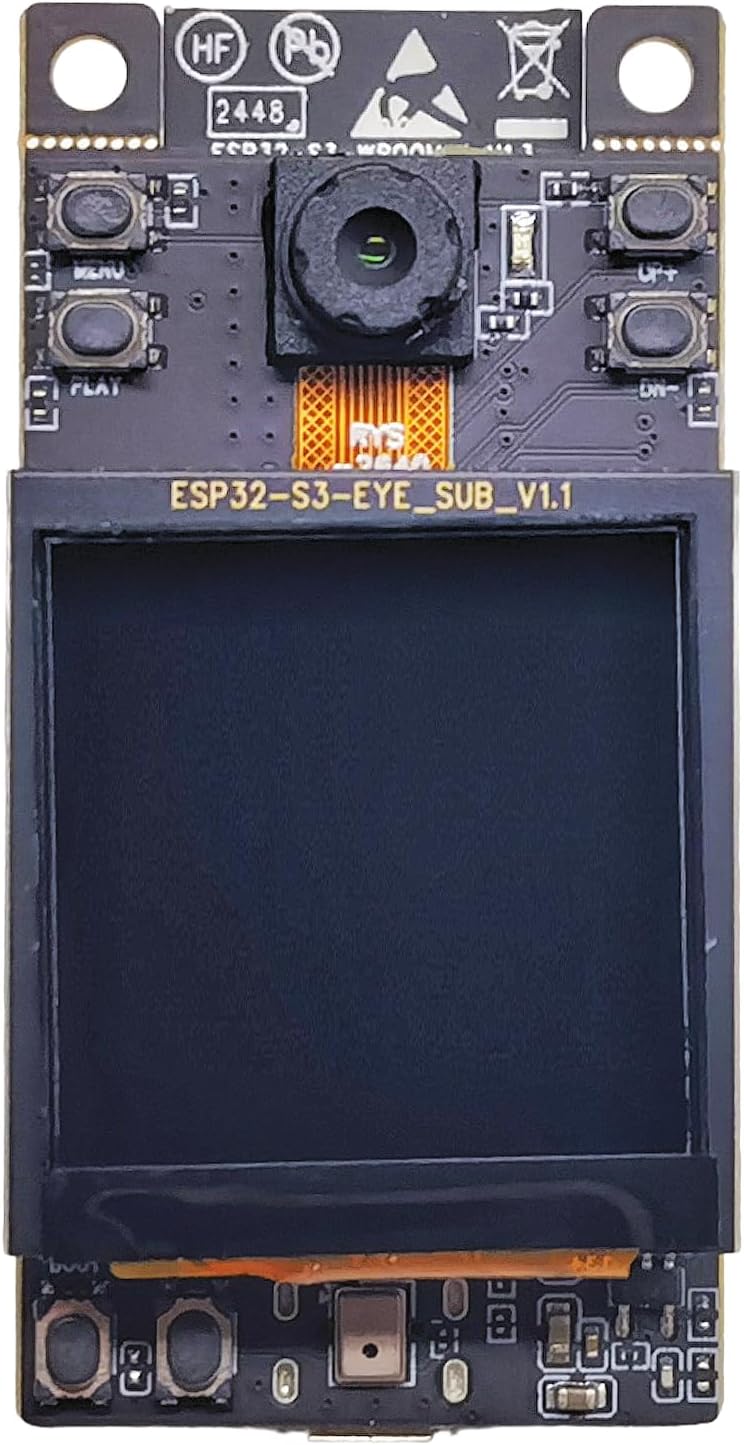
The ESP32-S3-EYE is the only board in this lineup made by Espressif itself rather than a third-party manufacturer. It was designed specifically to showcase what the ESP32-S3 can do with camera and AI workloads, and it shows. The board packs 8MB Octal PSRAM, 8MB Flash, an OV2640 camera, a 1.3-inch 240×240 LCD display, a digital microphone, an accelerometer (QMA7981), a microSD card slot, and a user button, all on a well-designed PCB with good thermal performance.
Arduino IDE support is confirmed: CAMERA_MODEL_ESP32S3_EYE is explicitly defined in the official CameraWebServer example that ships with the Arduino ESP32 core. Select “ESP32-S3-EYE” from Tools > Board in Arduino IDE and the standard camera examples work. The web interface includes face detection bounding boxes running on-device, which is impressive to see running on a microcontroller. Full face recognition with enrolled faces (ESP-WHO) is an ESP-IDF feature, not available in the Arduino IDE environment, so if that specific use case matters to you, you’ll need to explore ESP-IDF. ArduinoYard has a useful introduction to getting started with ESP-IDF if you want to go further.
The 1.3-inch LCD is a genuine project feature, not just a demo gimmick. It runs on SPI and is fast enough to display a live camera feed locally while the Wi-Fi stream runs simultaneously. The accelerometer enables gesture-based controls, which opens up some creative project ideas that go beyond simple surveillance.
One note: this board uses Micro-USB rather than USB-C, which is a step back compared to the other S3 boards in this lineup. Not a dealbreaker, but worth knowing.
Specifications:
- Chip: ESP32-S3 (dual-core LX7, 240 MHz, vector extensions for AI)
- Camera: OV2640 2MP
- PSRAM: 8MB Octal
- Flash: 8MB
- Display: 1.3-inch 240×240 LCD (SPI)
- Microphone: Digital PDM microphone
- Accelerometer: QMA7981
- MicroSD: Yes
- Wi-Fi: 802.11 b/g/n, 2.4 GHz
- Bluetooth: 5.0 LE
- USB: Micro-USB
- Made by: Espressif Systems (official board)
Why it stands out:
- Official Espressif board with the best long-term software support of any board here
- Onboard LCD display for local camera preview
- 8MB Octal PSRAM for the most stable high-resolution streaming
- Accelerometer enables motion/gesture-based control in projects
CameraWebServerexample with face detection works in Arduino IDE out of the box- Sold directly by Espressif on Amazon
Things to keep in mind:
- Micro-USB, not USB-C
- Full ESP-WHO face recognition requires ESP-IDF (not Arduino IDE)
- LCD and accelerometer require additional libraries beyond the camera setup
- Slightly higher learning curve than Freenove or Aideepen for full feature use
👉 Buy Espressif ESP32-S3-EYE on Amazon
Verdict: If face detection or on-device AI is the point of your project, the ESP32-S3-EYE is the most capable board here for that specific purpose, and the fact that it’s made by Espressif means the software support will never be abandoned. The Micro-USB is annoying, but the hardware is excellent. Recommended for intermediate makers with a clear AI/vision use case.
6. Best Complete Learning Kit: Freenove ESP32 Ultimate Starter Kit
Freenove ESP32 Ultimate Starter Kit (with CAM Board)
Best for: Complete beginners who want everything in one box: the board, components, and a structured learning path.

This is a different kind of entry compared to the standalone boards above. The Freenove Ultimate Starter Kit isn’t just a camera board. It’s 240 components, 122 projects, a 795-page downloadable tutorial, code in C, MicroPython, and Processing (Java), and a 1GB microSD card, all built around the Freenove ESP32-WROVER CAM board. If you’re starting from zero and want a structured path from “blink an LED” to “build a camera web server,” this is the kit that delivers it.
The board itself is based on the ESP32-WROVER (not S3), which means it’s the older LX6 dual-core chip with 4MB Flash and 8MB PSRAM. It has an onboard USB programmer so you don’t need an external FTDI adapter, a microSD slot, an OV2640 camera connector, and a reasonable number of GPIO breakouts. Being a WROVER, it doesn’t have the vector extensions or the speed of the S3-based boards, but it’s more than capable for the learning projects in the tutorial, which includes camera web server, video streaming, and socket-based camera projects in the later chapters.
The tutorial is the genuine value proposition here. At 795 pages it covers electronics basics, every component in the kit, complete project code with detailed explanations, and wiring diagrams. It’s available in English and can be translated in-browser. Freenove also provides free technical support if you get stuck, which for a beginner navigating a camera project for the first time is worth more than the spec sheet suggests.
What’s included:
- ESP32-WROVER CAM board with onboard USB programmer
- OV2640 2MP camera module
- 1GB microSD card and card reader
- Breadboard, jumper wires, LEDs, resistors, buttons, capacitors
- Sensors: temperature, humidity, ultrasonic, IR, and more
- Modules: LCD display, relay, servo, stepper motor, and others
- 240 components total across 122 projects
- 795-page tutorial (C, MicroPython, and Processing/Java code)
Why it stands out:
- Everything you need to learn ESP32 and camera projects in one box
- 795-page tutorial is one of the best beginner resources available
- 122 projects from basic to advanced, structured learning path
- Onboard programmer, no FTDI adapter required
- Freenove provides free technical support
Things to keep in mind:
- Older ESP32-WROVER chip (LX6), not ESP32-S3
- 4MB Flash is limiting if you plan to build large applications later
- Tutorial is download-only, no physical book
- Larger upfront cost than buying just a camera board
- Some components in the kit will feel redundant if you already have a component collection
👉 Buy Freenove ESP32 Ultimate Starter Kit on Amazon
Verdict: If you’re buying your first ESP32 camera board and you don’t yet have a component collection or a clear sense of where to start, this kit removes every barrier. The tutorial is genuinely excellent and the component variety means you won’t be stuck waiting for parts to arrive before trying new projects. For pure beginners, it’s arguably the best value buy in this entire list.
Which ESP32 Camera Board Should You Buy?
The right board comes down to three questions: what’s your experience level, how much space do you have for the build, and what’s the project actually trying to do?
For absolute beginners who want a focused learning experience with everything included, the Freenove Ultimate Starter Kit is the answer. The 795-page tutorial holds your hand from LED blinking through camera web servers, and having 240 components already in the box means you can follow every project without waiting for parts. If you already have a component collection and just need the board, the Aideepen ESP32-CAM-MB is the cheapest capable option and has more tutorials available than any other board here.
For beginners who want a modern standalone board without a full kit, the Freenove ESP32-S3 CAM Board is the best pick. The S3 chip, 8MB PSRAM, USB-C, and Freenove’s own tutorial make it significantly more capable and better documented than the AI Thinker design. The step up in price is justified.
If the project needs to fit in a small enclosure, a wearable, or needs to run on battery, look at the XIAO ESP32S3 Sense. Nothing else here is remotely as compact, and the built-in LiPo charging circuit saves you from adding an external charger. The SenseCraft AI face detection option is also the friendliest no-code AI experience in this lineup.
For a motion-activated security camera with an onboard display, the LILYGO T-Camera S3 packages everything you’d otherwise wire up yourself onto one board. The IDE setup friction is real, but if you’re comfortable following a GitHub README and managing Arduino core versions, the hardware rewards are worth it.
The Espressif ESP32-S3-EYE belongs in a build where face detection or on-device AI is the primary goal, or when you want the peace of mind that comes with buying directly from the chip manufacturer. Intermediate makers experimenting with computer vision will get the most from it.
Understanding ESP32 vs ESP32-S3 for Camera Projects
Choosing between an ESP32 (original) and an ESP32-S3 board matters a lot more for camera projects than it does for basic IoT work. Here’s what actually changes.
The ESP32 uses Tensilica LX6 cores running at up to 240 MHz. The ESP32-S3 uses the newer LX7 cores at the same clock speed, but with additional vector instructions that accelerate certain mathematical operations. For camera streaming and basic image capture, the performance difference is modest. For face detection, object recognition, or any machine learning workload running on-device, the S3’s vector instructions can be a meaningful speedup.
The bigger practical difference is memory. The original ESP32-CAM typically comes with 4MB PSRAM. ESP32-S3 boards in this lineup all have 8MB PSRAM. More PSRAM means larger frame buffers, which means more stable streaming at higher resolutions, fewer dropped frames, and better performance when the CPU is doing something else while the camera runs. If you’ve ever seen an ESP32-CAM stream drop to a slideshow at UXGA resolution, the main culprit is PSRAM, not CPU speed.
The S3 also added native USB support, which is why S3 boards can use USB-C for programming without needing a dedicated USB-to-UART chip in some configurations. It also adds Bluetooth 5.0 LE where the original ESP32 had Bluetooth 4.2.
For a first camera project at VGA or SVGA resolution, an original ESP32-CAM works perfectly. For anything that needs to run reliably at higher resolution, handle AI inference on-device, or run for extended periods, an S3-based board is the better foundation.
Why PSRAM Matters More Than Almost Anything Else
PSRAM stands for Pseudo-Static RAM, and for camera projects, it’s the single most important spec after the chip itself.
Camera frames take up a lot of memory. A VGA frame (640×480) in JPEG format might only be 20-50KB, but in raw RGB format it’s around 900KB. UXGA (1600×1200) in raw RGB is over 5MB per frame. The ESP32’s internal SRAM is only 520KB, which isn’t enough to hold a single uncompressed frame at most resolutions. PSRAM provides the external buffer space that makes camera streaming work at all.
With 4MB PSRAM, you can reliably stream JPEG frames up to about SVGA (800×600) with a decent frame rate. Push to XGA (1024×768) or UXGA, and you’ll see dropped frames, instability, or connection drops under load, especially if Wi-Fi is active simultaneously. With 8MB PSRAM, UXGA streaming is stable, and you have enough buffer headroom for dual-frame buffering, which improves throughput significantly.
This is why moving from an ESP32-CAM (4MB PSRAM) to any ESP32-S3 board (8MB PSRAM) makes such a visible difference in streaming quality, beyond the chip speed improvement. If your project involves capturing still images to an SD card at full resolution rather than continuous streaming, 4MB is less of a constraint. For smooth video streaming, aim for 8MB.
Final Recommendation
For most beginners, the Freenove ESP32-S3 CAM Board is the best standalone ESP32 camera board to buy in 2025. It has the right chip, the right amount of memory, USB-C, and documentation that actually helps. If you’re starting from zero with no components, the Freenove Ultimate Starter Kit gives you a complete learning path and removes every getting-started barrier.
For portable or compact builds, the XIAO ESP32S3 Sense is in its own category: nothing this capable is this small, and the built-in battery management makes it practical for battery-powered projects without extra hardware.
For project tutorials that extend what you can do with these boards, ArduinoYard has guides on gesture and face detection with ESP32, building an ESP32 web server with images, and getting started with ESP-IDF for those who want to go beyond Arduino IDE.
Looking for more ESP32 hardware guides? Check out our Best ESP32 Development Boards, Best ESP32 Starter Kits, and ESP32 vs Arduino comparison on ComponentAdvisor.