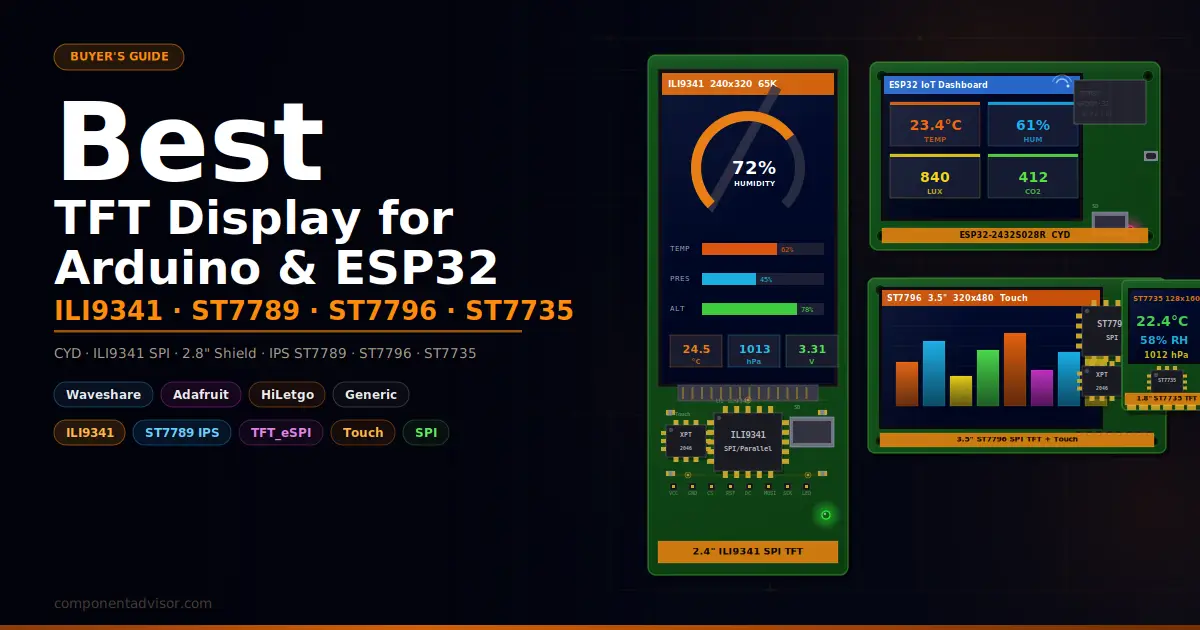
If you’re shopping for the best TFT display for Arduino and ESP32 projects, the options can get confusing fast. Driver chips, SPI versus parallel interfaces, resistive versus capacitive touch, shields versus standalone modules: there’s a lot to sort through before you spend any money. This guide cuts straight to the products worth buying, covers what makes each one the right fit for a specific use case, and explains the technical differences that actually matter for your build.
TFT displays bring full color graphics to microcontroller projects in a way that OLED and character LCD displays simply can’t match. If you want to display sensor data with gauges and charts, build a touchscreen menu, show camera feeds, or put together a custom IoT dashboard, a TFT is the right display category. They range from tiny 1.8-inch modules that draw almost no power to 3.5-inch touchscreens that can run a full LVGL-powered UI on an ESP32.
The six displays below cover every common use case: budget builds, beginner-friendly shields, compact SPI modules, IPS panel quality, large touch displays, and all-in-one ESP32 boards with the display already built in.
Looking to pair your display with the right board? Check our guides to the Best ESP32 Development Boards and Best Arduino Boards for Beginners. For other display options, see our Best OLED Displays for Arduino and ESP32 roundup.
Quick Comparison Table
| Display | Size | Resolution | Driver | Interface | Touch | Best For |
|---|---|---|---|---|---|---|
| ESP32-2432S028R (CYD) | 2.8″ | 240×320 | ILI9341 | Built-in | Resistive | All-in-one ESP32 IoT display |
| 2.4″ SPI TFT ILI9341 | 2.4″ | 240×320 | ILI9341 | SPI | Resistive | Best beginner standalone module |
| 2.8″ TFT Shield ILI9341 | 2.8″ | 240×320 | ILI9341 | Parallel | Resistive | Plug-and-play for Arduino UNO |
| Waveshare 2″ IPS ST7789 | 2.0″ | 240×320 | ST7789 | SPI | None | Best image quality, compact builds |
| 3.5″ SPI TFT ST7796 | 3.5″ | 320×480 | ST7796 | SPI | Resistive | Largest screen on this list |
| 1.8″ TFT ST7735 | 1.8″ | 128×160 | ST7735 | SPI | None | Ultra-budget, basic data display |
1. Best All-in-One TFT Display Board
ESP32-2432S028R (Cheap Yellow Display)
Best for: Anyone who wants a complete ESP32 IoT display without any wiring, perfect for dashboards, GUIs, and home automation panels.

The ESP32-2432S028R, better known in the maker community as the Cheap Yellow Display or CYD, is one of the most practical boards you can buy for display projects. It combines a full ESP32-WROOM-32 module with a 2.8-inch resistive touchscreen TFT, an SD card slot, an RGB LED, and all the circuitry needed to power and program it, all on a single board for very little money. There’s no wiring to get wrong, no SPI pin juggling, no voltage level headaches.
The display uses an ILI9341 driver over SPI and the touch controller is an XPT2046, both of which are well supported by TFT_eSPI and the wider Arduino ecosystem. The ESP32 handles the display fast enough for smooth UI animations, and because Wi-Fi and Bluetooth are built into the chip, you can build connected dashboards, MQTT-driven displays, or home automation panels without adding any extra hardware. It has become the default recommendation for anyone asking how to add a color touchscreen to an ESP32 project.
One thing to watch: there are hardware revisions in the wild with slightly different drivers. Some units ship with ST7789 instead of ILI9341. If you get a blank screen after uploading code, try switching the driver in your TFT_eSPI User_Setup.h. Check the back of the board for markings if you’re unsure.
Specifications:
- MCU: ESP32-WROOM-32 (dual-core 240MHz, 4MB flash)
- Display: 2.8-inch TFT, 240×320 resolution, 65K colors
- Driver: ILI9341 (some units: ST7789)
- Touch: Resistive, XPT2046 controller
- Interface: SPI (display and touch share the SPI bus)
- Storage: MicroSD card slot
- Extras: RGB LED, USB-C for power, CH340 for programming
- Voltage: 5V input
Why it stands out:
- No wiring required: ESP32 and display are pre-connected on a single board
- Wi-Fi and Bluetooth onboard for IoT projects
- Works with TFT_eSPI, LVGL, and Arduino IDE out of the box
- MicroSD slot for loading images and assets
- Active community with ready-to-run example code
- Outstanding value for a complete development board
Things to keep in mind:
- Some units ship with ST7789 driver rather than ILI9341, requiring a User_Setup.h change
- Resistive touch requires a stylus or firm press for best accuracy
- GPIO availability is limited: only a few pins exposed via header since most are used internally
- Needs a USB-A to USB cable for programming, not USB-C to USB-C
👉 Buy ESP32-2432S028R (CYD) on Amazon
Verdict: The CYD is the fastest way to get a working color touchscreen IoT project running on ESP32. If you want to skip the wiring stage entirely and jump straight to building a dashboard or GUI, this is the one to buy.
2. Best Standalone TFT Module for Beginners
2.4″ SPI TFT Display with ILI9341
Best for: Beginners who want a flexible standalone TFT module compatible with both Arduino and ESP32, with the widest possible tutorial support.

The 2.4-inch ILI9341 SPI TFT is the most popular standalone TFT module for good reason. The ILI9341 is the most documented display driver in the Arduino ecosystem: there are thousands of tutorials, Adafruit GFX examples, TFT_eSPI configs, and community threads covering exactly this chip. If you get stuck, you will find an answer quickly.
The 240×320 resolution at 2.4 inches gives you a sharp, readable display at a reasonable size. The SPI interface keeps wiring minimal: you need MOSI, MISO, SCK, CS, DC, and RST, plus power and ground. The onboard level shifting means it works with both 5V Arduino boards and 3.3V ESP32 without extra components. The module also includes a resistive touchscreen and an SD card slot, making it a solid platform for interactive projects.
On ESP32, TFT_eSPI with hardware SPI and DMA enabled pushes this display comfortably fast enough for smooth graphics updates. On Arduino Uno, performance is slower due to the slower SPI clock and processor, so keep that in mind for animation-heavy sketches. For sensor readouts, data displays, and menus the Uno handles it well.
Specifications:
- Size: 2.4 inches
- Resolution: 240×320
- Driver: ILI9341
- Interface: 4-wire SPI
- Touch: Resistive (XPT2046)
- SD card slot: Yes
- Voltage: 3.3V and 5V compatible
- Colors: 65K (RGB565)
Why it stands out:
- ILI9341 is the most tutorial-rich driver chip available for makers
- Works with Arduino Uno, Mega, Nano, and all ESP32 variants
- Compatible with Adafruit GFX, TFT_eSPI, and UTFT libraries
- Onboard level shifting handles both 3.3V and 5V logic
- Resistive touch and SD card slot included
- Low cost with consistent availability
Things to keep in mind:
- SPI wiring takes 6 GPIO pins: plan your pinout before buying
- Performance on Arduino Uno is noticeably slower than on ESP32
- Resistive touch requires calibration before accurate input
- Standard TN panel: viewing angles are limited compared to the Waveshare IPS module below
👉 Buy 2.4″ ILI9341 SPI TFT on Amazon
Verdict: The best starting point for anyone who wants to learn TFT displays from scratch. The ILI9341 driver and SPI interface are covered by more tutorials than any other combination in this category. Buy this one if you want maximum learning resources and flexibility across boards.
3. Best TFT Shield for Arduino UNO
2.8″ TFT Touch Shield for Arduino UNO (ILI9341)
Best for: Arduino UNO and Mega users who want zero wiring: plug the shield directly onto the board and it works.

The 2.8-inch TFT Shield is built for one specific use case: snap it onto an Arduino UNO or Mega and start coding without touching a single wire. The shield format covers all the digital pins on the Uno’s right side and uses an 8-bit parallel bus rather than SPI. This parallel interface is actually faster than SPI on an Arduino Uno because it pushes 8 bits per transfer rather than 1, which helps with screen refresh speed on a 16MHz processor.
The included touch controller and SD card slot mean you get a complete display system the moment you plug it in. Libraries like MCUFRIEND_kbv and Adafruit GFX both support this shield well, and there are extensive examples for both. The 240×320 ILI9341 driver is the same chip as the standalone module above, so your code logic transfers easily if you move to an SPI setup later.
The trade-off is flexibility: the parallel interface occupies most of the Uno’s digital pins, leaving very little GPIO for external sensors or actuators. If your project needs more than a few extra pins alongside the display, an SPI module with an ESP32 will serve you better.
Specifications:
- Size: 2.8 inches
- Resolution: 240×320
- Driver: ILI9341
- Interface: 8-bit parallel (UNO/Mega shield connector)
- Touch: Resistive (includes stylus)
- SD card slot: Yes
- Voltage: 5V (Uno direct)
- Colors: 65K (RGB565)
Why it stands out:
- Plug-and-play: no wiring, no breadboard, no jumper cables
- Parallel interface is faster than SPI on Arduino Uno
- Onboard 5V to 3.3V conversion included
- Well-supported by MCUFRIEND_kbv and Adafruit GFX
- Stylus included for touch input
- Solid physical fit on the Uno
Things to keep in mind:
- Occupies almost all of the Uno’s digital pins, leaving little room for other components
- Not compatible with ESP32 in shield format (designed for UNO pin layout)
- Switching microcontrollers later requires rewiring to SPI
- Resistive touch accuracy needs calibration like any pressure-based display
👉 Buy 2.8″ TFT Shield for Arduino on Amazon
Verdict: If you’re on an Arduino Uno and want the fastest possible setup with zero wiring effort, this shield is the right choice. It’s not the most flexible option on this list, but for dedicated Uno display projects it’s hard to beat for convenience.
4. Best TFT Display for Image Quality
Waveshare 2″ IPS LCD Module (ST7789)
Best for: Projects where display quality matters: sharper colors, wide viewing angles, and a compact footprint for enclosure builds.
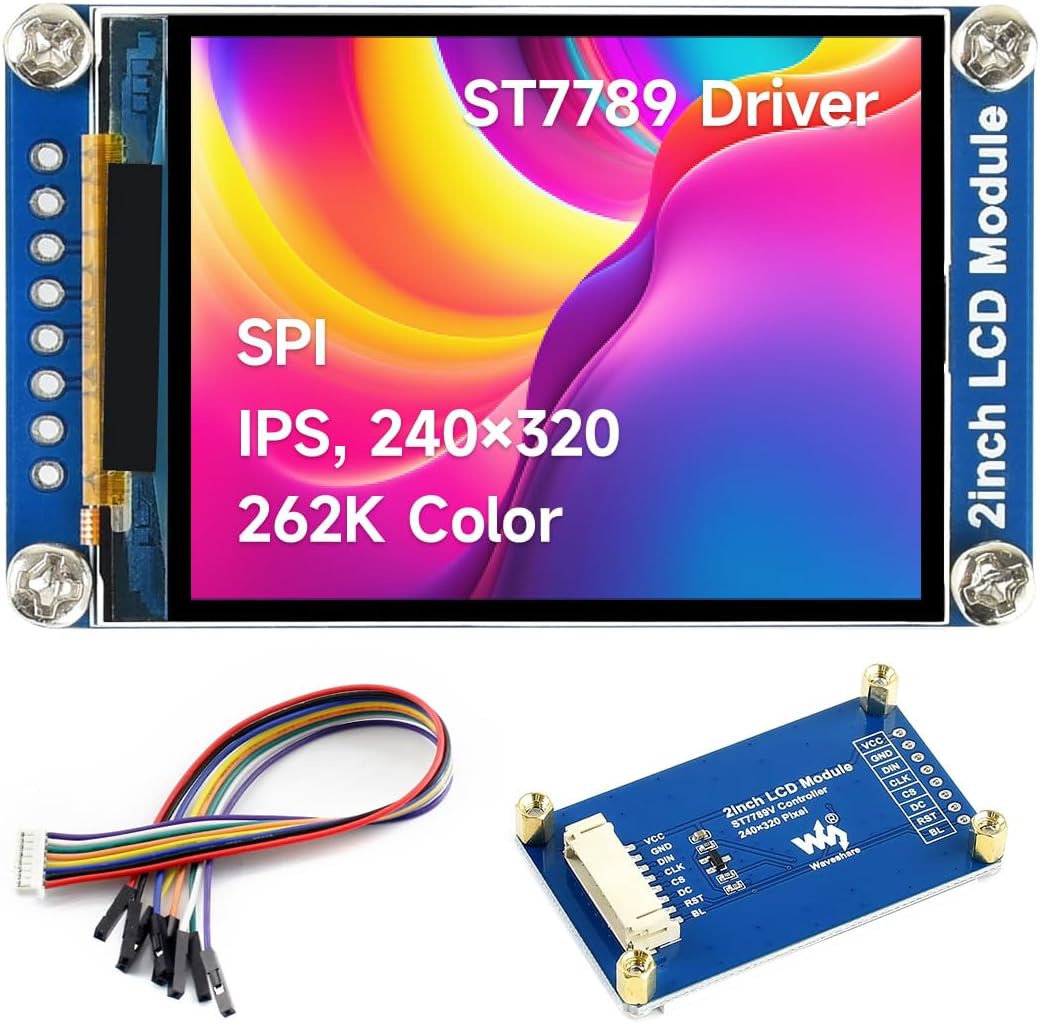
The Waveshare 2-inch IPS LCD with ST7789 driver stands out from the rest of this list because it uses an IPS panel rather than a standard TN-type TFT. The difference is visible. IPS gives you wider viewing angles (colors stay accurate when you look from the side), better contrast, and more accurate color reproduction. For projects in enclosures, displays at an angle, or anything showing images that should look good rather than just readable, IPS makes a real practical difference.
The ST7789 driver is fast and well-supported by both Adafruit GFX (via the Adafruit_ST7789 library) and TFT_eSPI. The 240×320 resolution on a 2-inch screen gives a noticeably sharper image than the same resolution on a 2.4 or 2.8-inch display, since the pixels are more tightly packed. At 3.3V operating voltage, it’s a natural fit for ESP32, Raspberry Pi, and STM32 without any level conversion. Waveshare ships it with good documentation and example code for multiple platforms.
The main limitation is no touchscreen. This module is display output only. If your project needs touch input, look at the ILI9341 SPI module or the CYD. But for data dashboards, image viewers, status panels, or any application where you’re displaying output rather than taking input, the IPS quality is worth choosing over a cheaper standard TFT.
Specifications:
- Size: 2.0 inches
- Resolution: 240×320
- Driver: ST7789VW
- Panel type: IPS
- Interface: 4-wire SPI
- Touch: None
- Voltage: 3.3V
- Colors: 262K (18-bit)
Why it stands out:
- IPS panel: wider viewing angles and better color accuracy than standard TFTs
- ST7789 driver is fast and well-supported across libraries
- 262K color depth vs 65K on most budget TFTs
- Compact 2-inch size fits tight enclosures
- Official Waveshare documentation with multi-platform example code
- Works with Raspberry Pi, ESP32, Arduino, and STM32
Things to keep in mind:
- No touchscreen: display output only
- 3.3V only, so 5V Arduino boards need level conversion
- Smaller screen than others on this list
- SPI interface still requires 5 to 6 GPIO pins
👉 Buy Waveshare 2″ IPS LCD ST7789 on Amazon
Verdict: The best-looking display on this list. If you care about image quality and are building something where the display is visible to others, the IPS panel and 262K color depth are worth the slight size trade-off. The natural choice for ESP32 and Raspberry Pi projects where visual output matters.
5. Best Large TFT Display
3.5″ SPI TFT Touchscreen (ST7796)
Best for: Projects that need a larger screen with touch input and SD card storage, compatible with both Arduino Mega and ESP32.

The 3.5-inch ST7796 SPI TFT offers the largest screen on this list at 320×480 resolution, giving you considerably more space for information-dense displays, larger text, multi-element GUIs, or anything where you need room to show multiple sensor readings at once. The ST7796 driver supports both SPI and parallel; this module uses SPI, keeping wiring manageable.
At 3.5 inches and 320×480 pixels, the absolute display area is much larger than any other option here, even though pixel density is lower than the 2-inch Waveshare. The included resistive touchscreen uses an XPT2046 controller, the same chip as the ILI9341 module, so calibration and reading touch coordinates works identically. The SD card slot adds flexibility for data logging projects or image-based displays.
On ESP32, TFT_eSPI handles the ST7796 at solid SPI speeds. On Arduino Uno, full-screen redraws are noticeably slow due to the larger framebuffer and slower SPI. For Uno use, limit redraws to changed regions only. Arduino Mega handles it better with more SRAM available. For ESP32, this is a comfortable and capable pairing.
Specifications:
- Size: 3.5 inches
- Resolution: 320×480
- Driver: ST7796
- Interface: 4-wire SPI
- Touch: Resistive (XPT2046)
- SD card slot: Yes
- Voltage: 3.3V and 5V compatible
- Colors: 65K (RGB565)
Why it stands out:
- Largest screen and highest resolution on this list
- More display area for complex UIs, charts, and multi-value dashboards
- SPI interface works with Arduino, Mega, and ESP32
- XPT2046 touch controller: same calibration process as ILI9341 modules
- SD card for loading images and data
- Good TFT_eSPI support for the ST7796 driver
Things to keep in mind:
- Full-screen redraws are slow on Arduino Uno: use partial updates
- 3.5-inch size adds bulk: not suited for compact builds
- Standard TFT panel, not IPS: viewing angles are limited
- SPI pinout needs 6 GPIO pins
👉 Buy 3.5″ ST7796 SPI TFT on Amazon
Verdict: The right choice when screen size matters more than compactness. For ESP32-powered dashboards, weather stations, and data displays where you need room to show multiple values at readable sizes, the 3.5-inch format makes a real practical difference.
6. Best Budget TFT Display
1.8″ TFT SPI Display (ST7735)
Best for: Ultra-budget builds, simple data readouts, and any project where a small, low-power color display is all you need.

The 1.8-inch ST7735 TFT is the cheapest color display option on this list. It shows 128×160 pixels in 65K colors over SPI, draws very little power, and has been a fixture of Arduino starter projects for years. The resolution is low by modern standards, but for displaying temperature readings, status text, battery percentages, basic icons, or simple graphs, 128×160 is workable.
The ST7735 driver has long been supported by Adafruit GFX and TFT_eSPI. Setup is well-documented and the chip is forgiving to work with. The small physical size makes it useful for compact enclosures and battery-powered builds where display area matters less than footprint and power draw. Most versions run on 3.3V and need level conversion for 5V Arduino boards, though many modules include a basic onboard regulator.
There’s no touch input and no SD card on most versions. The 128×160 resolution limits what you can display comfortably. If you need any of those features, spending a bit more on the 2.4-inch ILI9341 module makes more sense. But as a quick, low-power color display for basic readouts, the ST7735 does exactly what it promises.
Specifications:
- Size: 1.8 inches
- Resolution: 128×160
- Driver: ST7735
- Interface: 4-wire SPI
- Touch: None
- SD card slot: Not included on most versions
- Voltage: 3.3V (some modules include onboard 3.3V regulator)
- Colors: 65K (RGB565)
Why it stands out:
- Lowest cost color TFT on this list
- Very low power draw, good for battery-powered projects
- Small footprint fits compact enclosures
- Well-documented with Adafruit GFX and TFT_eSPI
- Works with Arduino, ESP32, Raspberry Pi, and STM32
Things to keep in mind:
- 128×160 resolution is genuinely limited: text and graphics must be sized carefully
- No touch input, no SD card on most versions
- 3.3V only on many models: verify specs for the specific board
- Not suitable for image-heavy or UI-rich projects
👉 Buy 1.8″ ST7735 TFT on Amazon
Verdict: Buy this if you need a cheap color display for a simple sensor readout or status indicator and power draw matters. For anything more complex, the 2.4-inch ILI9341 module is worth the small extra cost. The ST7735 is fine for what it is, but its resolution ceiling is real.
Which TFT Display Should You Buy?
The best starting point for most makers is the 2.4-inch ILI9341 SPI module. The ILI9341 driver has more community support than any other chip in this category, it works with both Arduino and ESP32 without extra hardware, and the combination of touch input, SD card slot, and SPI interface covers a huge range of project types. If you run into problems, finding help online is easy.
If you’re building specifically for ESP32 and want a display without any wiring, the CYD (ESP32-2432S028R) is the best shortcut. You get Wi-Fi, Bluetooth, touch, and a color display on one board. The saved wiring time alone justifies it for IoT dashboard projects.
For Arduino UNO users who want zero setup complexity, the 2.8-inch shield is the obvious choice. Plug it on and start coding. Just accept that you’re using most of the Uno’s digital pins for the display.
If your project will be seen by people and image quality matters, the Waveshare 2-inch IPS is worth choosing over any standard TFT on this list. The IPS panel makes colors noticeably better, and the ST7789 is fast and well-supported. The lack of touch is the only real trade-off.
For projects that genuinely need a larger screen, the 3.5-inch ST7796 gives you more room to display information without jumping to a much larger form factor. Pair it with an ESP32 for the best performance.
The 1.8-inch ST7735 is the right call for battery-powered builds where display size and power draw need to be minimized, or when budget is the primary constraint.
Understanding TFT Driver Chips
The driver chip determines which libraries work, how fast the display refreshes, and what resolution you’re working with. These are the four drivers covered in this guide:
ILI9341 is the most popular TFT driver for maker projects. It drives 240×320 panels over SPI or parallel, supports 65K colors, and has been around long enough that every major Arduino display library covers it. TFT_eSPI, Adafruit GFX, and UTFT all handle ILI9341 well. On ESP32 with TFT_eSPI using SPI DMA, you can push it at speeds that allow smooth animation. The XPT2046 touch controller typically paired with ILI9341 modules is equally well-documented.
ST7789 is a more modern chip that supports resolutions up to 240×320 at higher color depths (up to 262K) and wider viewing angles on compatible IPS panels. Waveshare’s module uses the ST7789VW variant. Library support through Adafruit_ST7789 and TFT_eSPI is solid. The chip is particularly common on compact and round displays, and handles high-quality image display well.
ST7735 is the driver behind most 1.8-inch displays. It’s limited to 128×160 resolution but is lightweight on memory and power. Adafruit’s ST7735 library and TFT_eSPI both cover it well. For simple projects on constrained hardware, ST7735 remains a practical option.
ST7796 handles larger 320×480 panels, making it the right driver for 3.5-inch and 4-inch displays. It’s newer than ILI9341 but well-supported by TFT_eSPI. On ESP32 the performance is good; on Arduino Uno, full-screen refreshes are slow enough to notice during animation-heavy code.
SPI vs Parallel Interface
Most TFT modules today use SPI. A few Arduino UNO shields use parallel.
SPI uses 4 to 6 wires (MOSI, MISO, SCK, CS, DC, and optionally RST). It’s slower per-bit than parallel but the hardware SPI peripheral on ESP32 with DMA enabled closes that gap significantly. SPI is flexible: you can run multiple SPI devices on the same bus using different CS pins, and the low pin count leaves plenty of GPIO for other sensors and actuators. TFT_eSPI is specifically optimized for SPI on ESP32 and achieves excellent frame rates on ILI9341 and ST7796 at the SPI frequencies those chips support.
Parallel interface (8-bit or 16-bit) transfers a full byte or word per clock cycle, which gives faster raw throughput than single-bit SPI. On Arduino Uno, an 8-bit parallel TFT shield actually refreshes faster than an SPI module because the Uno’s SPI clock is slow. On ESP32, the SPI peripheral with DMA is fast enough that the parallel advantage largely disappears, and SPI is preferred for simpler wiring and broader compatibility.
TFT_eSPI vs Adafruit GFX
Both libraries work well but suit different situations.
TFT_eSPI is optimized specifically for ESP32 and ESP8266. It uses hardware SPI with DMA on ESP32, which means the processor is mostly free while pixel data transfers to the display. Frame rates on ILI9341 and ST7796 with TFT_eSPI on ESP32 are substantially higher than with Adafruit GFX on the same hardware. It also supports sprites (off-screen buffers for flicker-free animation) and a wide range of driver chips. The setup requires editing a User_Setup.h file to specify your driver and pins, which trips up beginners the first time, but it’s a one-time step.
Adafruit GFX is simpler to set up and works across a much wider range of boards including Arduino Uno. You specify your display type in the code, include the relevant driver library (Adafruit_ILI9341, Adafruit_ST7789, etc.), and go. The API is clean and well-documented. Performance on ESP32 is lower than TFT_eSPI because it doesn’t use DMA, but for static displays and low-refresh-rate readouts the difference rarely matters.
For beginners on Arduino Uno, start with Adafruit GFX. For ESP32 projects with animations, smooth UI transitions, or any performance-sensitive graphics work, TFT_eSPI is the better choice.
Resistive vs Capacitive Touch
Every touch-capable display on this list uses resistive touch. Here’s what that means in practice.
Resistive touch works by pressing two conductive layers together. It works with any object (finger, stylus, gloved hand), requires no electrical conductivity, and is cheap to manufacture. The trade-off is that it requires noticeable physical pressure, the surface feels less precise than modern smartphone screens, and it needs software calibration to map touch coordinates accurately. The XPT2046 controller used on ILI9341 and ST7796 modules is well-documented and calibrates reliably via SPI.
Capacitive touch detects the small electrical field from a fingertip, which is what phone screens use: light touch, smooth response, often multi-touch capable. Capacitive displays cost more and are less common in budget Arduino/ESP32 display modules. For maker projects with basic menus and buttons, resistive touch is perfectly adequate. If you need the smoother capacitive feel, look at the higher-end integrated ESP32 display boards from Elecrow or similar, which are outside this article’s scope.
Final Recommendation
For most people building their first TFT display project, the 2.4-inch ILI9341 SPI module is the best starting point: wide library support, works with everything, and the tutorials are plentiful. If you’re building something ESP32-specific and want to skip wiring entirely, the CYD (ESP32-2432S028R) is the smarter buy. For the best display quality in a compact form factor, the Waveshare 2-inch IPS is in a different visual league.
For hands-on tutorials to go with your new display, ArduinoYard has a full walkthrough on using the ILI9341 SPI TFT display with ESP32, covering wiring and TFT_eSPI setup in detail. If you’re comparing TFT options against OLED, the OLED display with ESP32 guide on ArduinoYard covers that trade-off well. For a project that pairs a display with live data, the ESP32 digital clock with NTP and OLED tutorial shows the full pattern of fetching data and rendering it on screen.
Exploring more display options? Check our guides to the Best LCD Display for Arduino and ESP32 and Best OLED Displays for Arduino and ESP32. Building out your workbench? Our Best Arduino Sensor Kits and Best Breadboard and Jumper Wire Kit guides are worth a look too.